

Import Survey (Trajectory) Data
"Survey" data is the well trajectory, the MD/INC/AZI stations that define the wellbore path.
"Survey" data is the well trajectory — the MD/INC/AZI stations that define the wellbore path. Importing it is what populates the GeoSteering cross-section, Map View, and 3D View for a well.
Where to Import Survey Data
-
Open a project and go to the GeoSteering tab.
-
In the left data/objects panel, find your well's node.
-
No trajectory yet: click the + (create) button on the well node — this opens Import Survey.
-
Trajectory already exists: click the ⋯ menu on the existing Trajectory node and choose Edit to re-import/update it, or Delete to remove it (with a confirmation prompt).
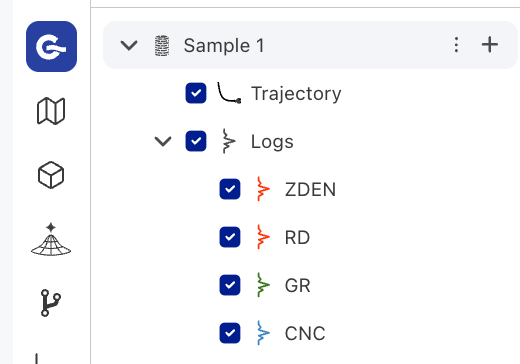
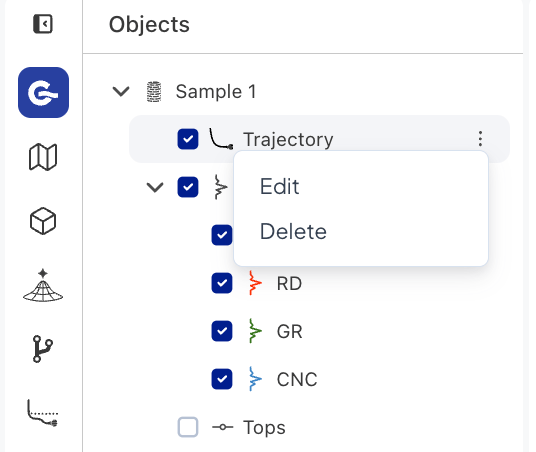
The import wizard has three steps: Import Survey → Review Mapping → Confirm Import.
Step 1 — Import Survey (choose your source)
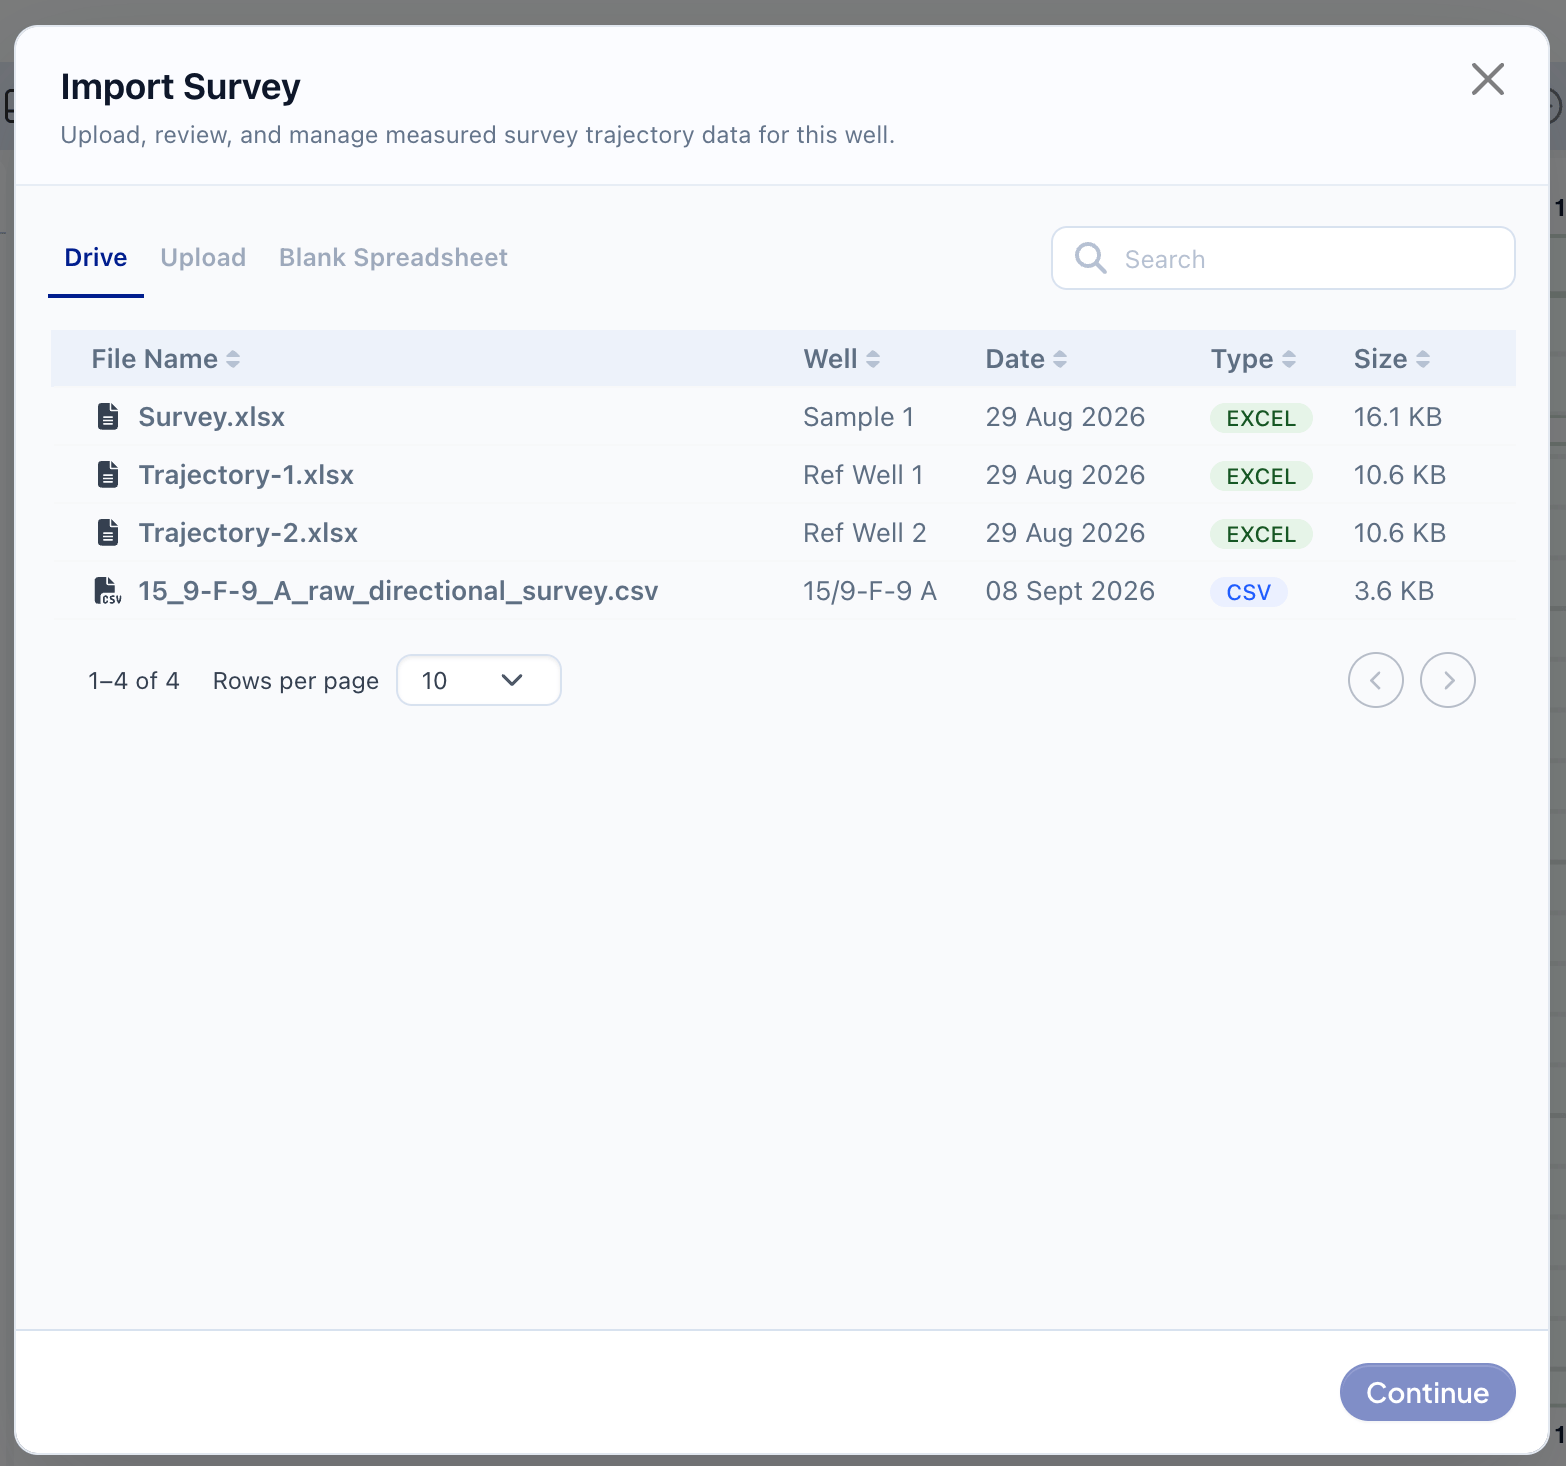
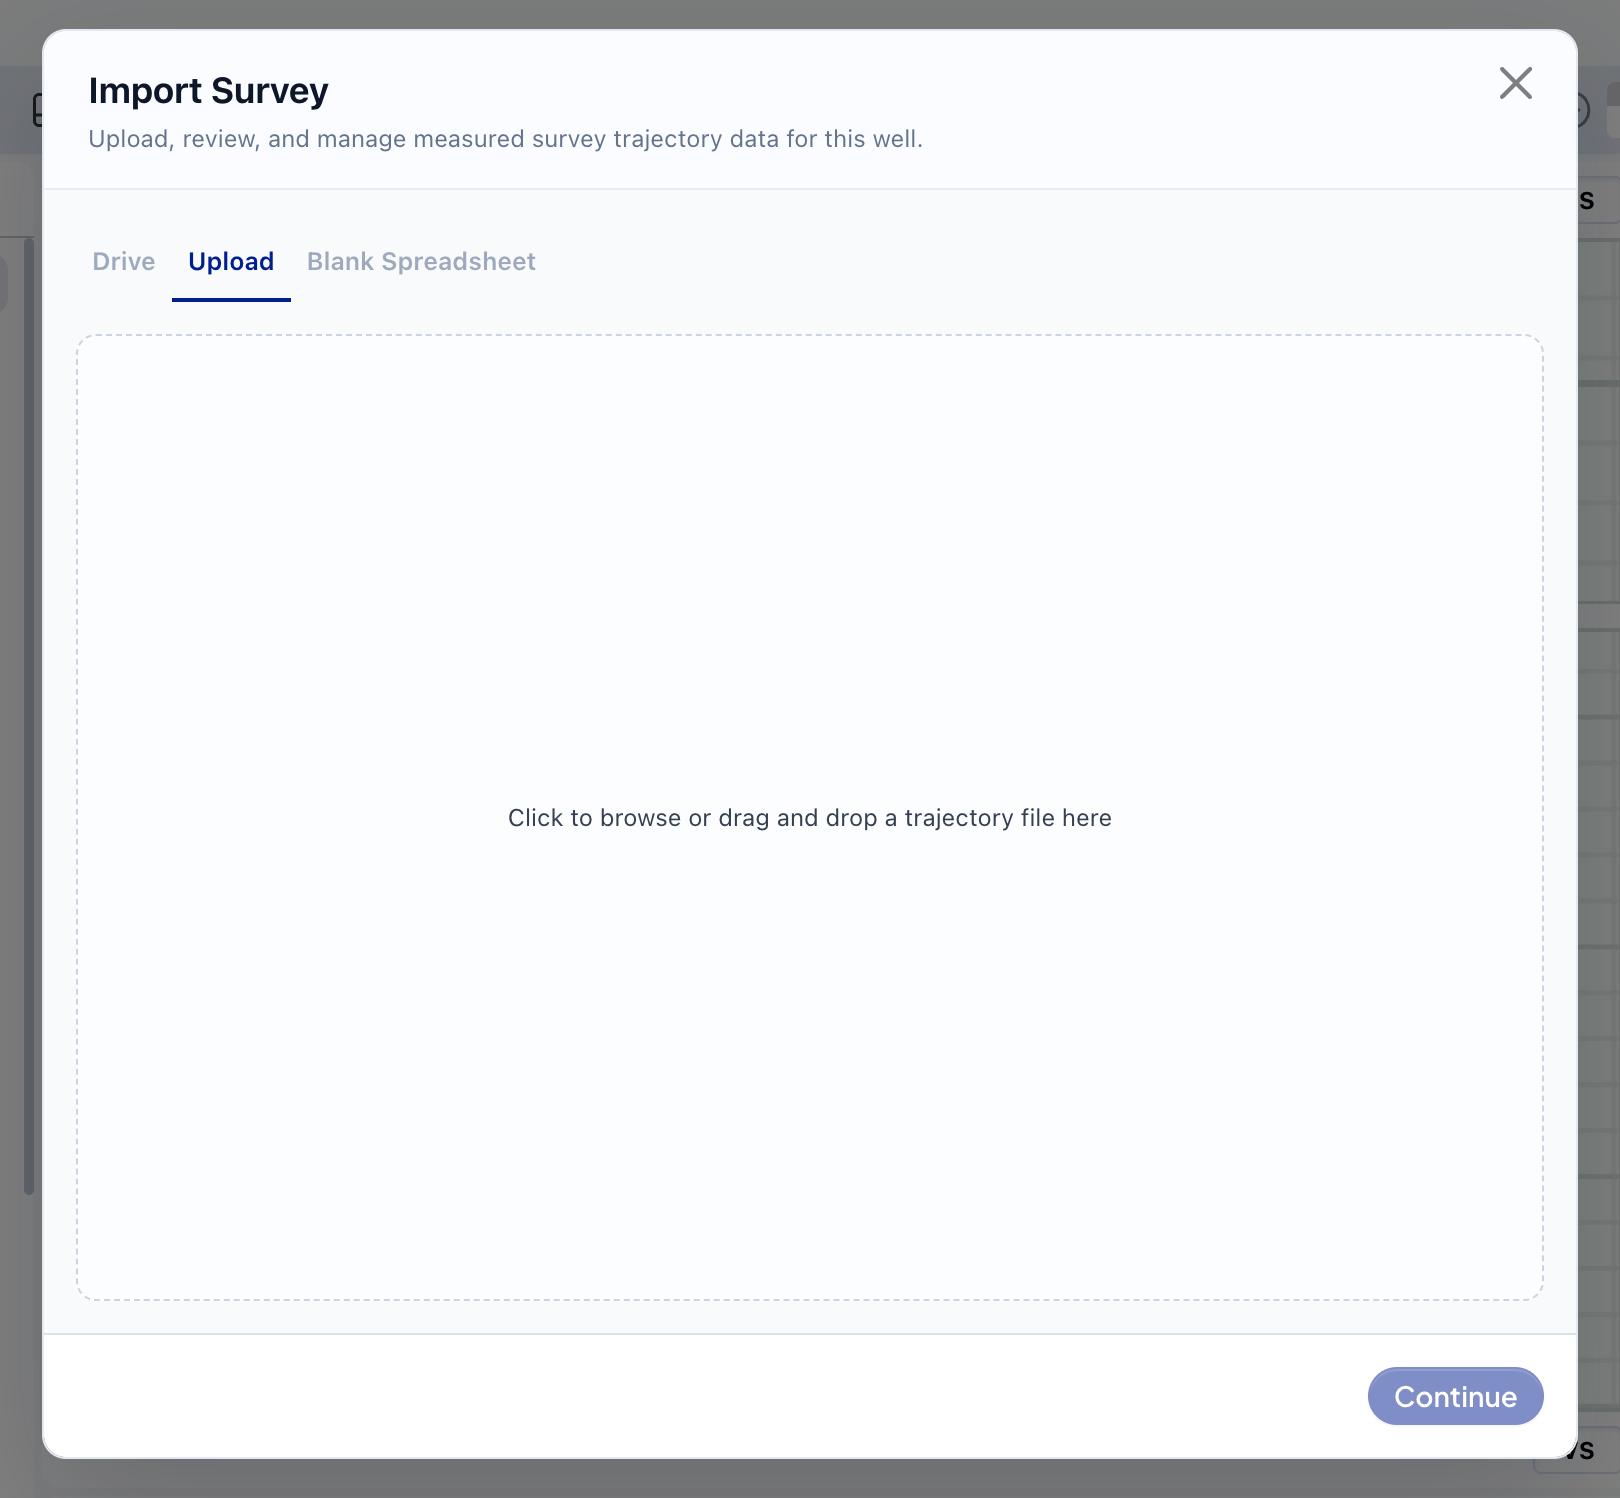
Pick where the data comes from, using the tabs at the top:
| Tab | What it does |
|---|---|
| Drive | Pick a file you've already stored in GeoMaster Drive (searchable list) |
| Upload | Upload a new file from your computer — click to browse or drag-and-drop |
| Blank Spreadsheet | Type or paste data directly into a grid pre-set with MD, INC, AZI columns |
Accepted uploaded formats include LAS and spreadsheet files (CSV/XLSX) — the wizard auto-detects the format and adapts the next step accordingly (e.g. a sheet picker appears for multi-sheet Excel files).
Click Continue to move to mapping (only enabled once a file is selected, or immediately if you're using the blank spreadsheet).
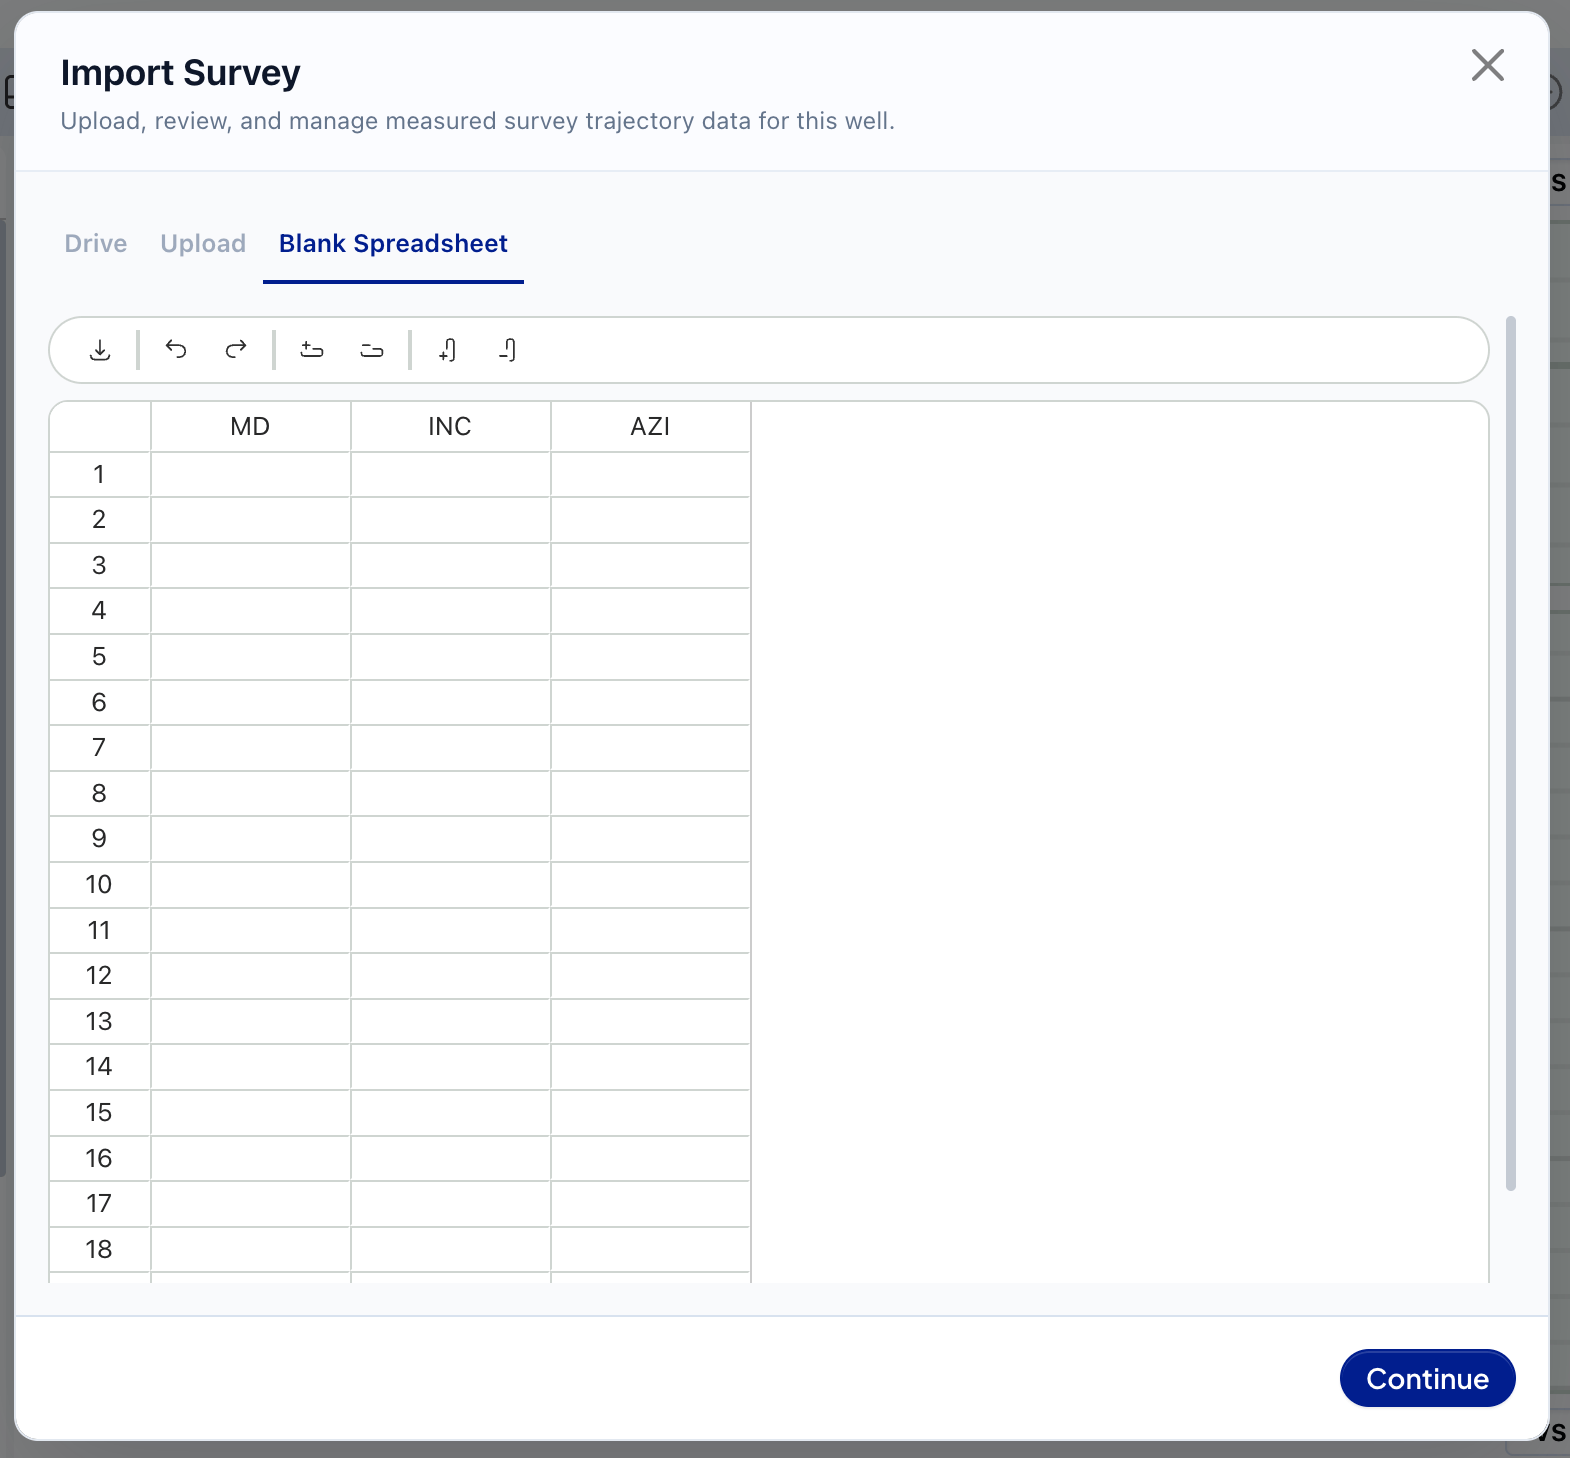
Step 2 — Review Mapping
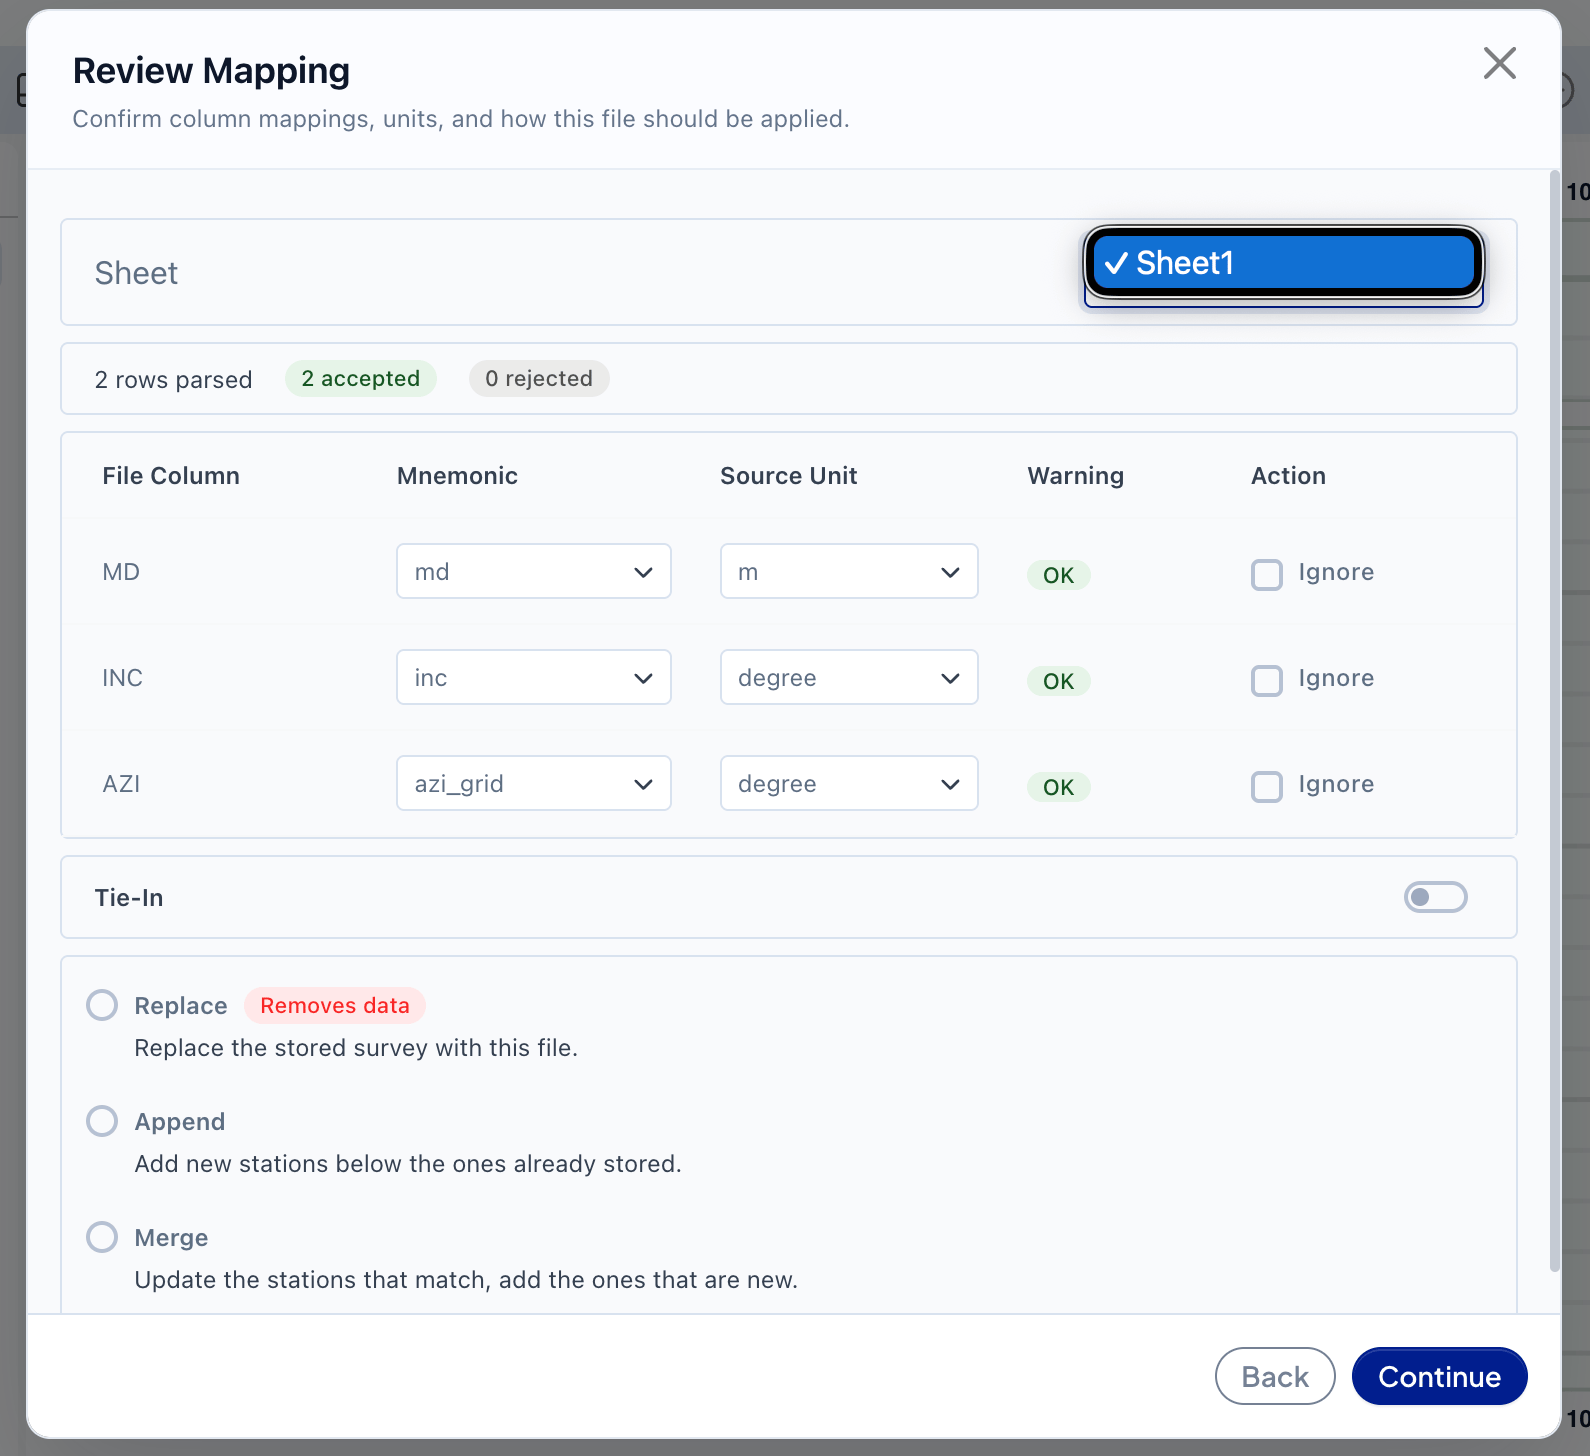
This step shows, top to bottom:
-
File info — for a LAS file, a "Well Info" box with header metadata; for an Excel file, a Sheet dropdown to pick which sheet to import.
-
Row summary — total rows parsed, with counts of accepted vs. rejected rows.
-
Warnings (if any) — global issues with the file, colour-coded by severity.
-
Column mapping table — one row per column in your file:
| Column | What you set |
|---|---|
| File Column | Read-only — the raw header from your file |
| Mnemonic | Searchable dropdown — map this column to a known field (e.g. MD, INC, AZI) |
| Source Unit | Searchable dropdown — the unit the column is actually in |
| Warning | A status badge; hover for detail |
| Action | Ignore checkbox to exclude that column entirely |
- Survey-specific fields:
-
Grid Convergence — shown only if you mapped a true-azimuth column.
-
Magnetic Declination — shown only if you mapped a magnetic-azimuth column.
-
Tie-In — a toggle; when on, enter MD, TVD, East, and North to tie this survey into an existing reference point.
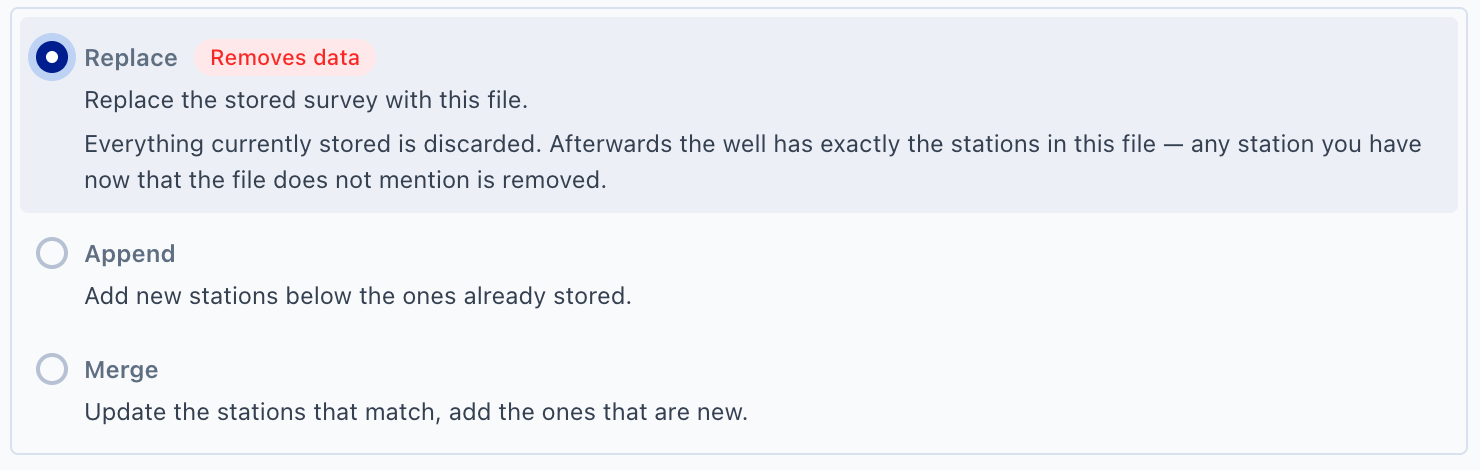
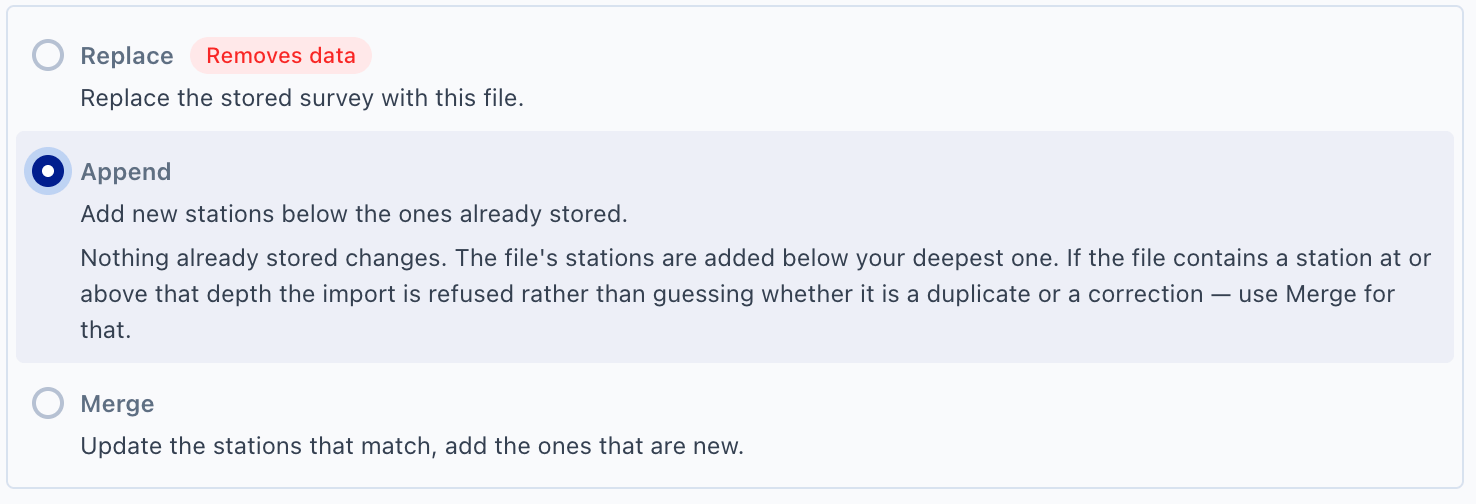
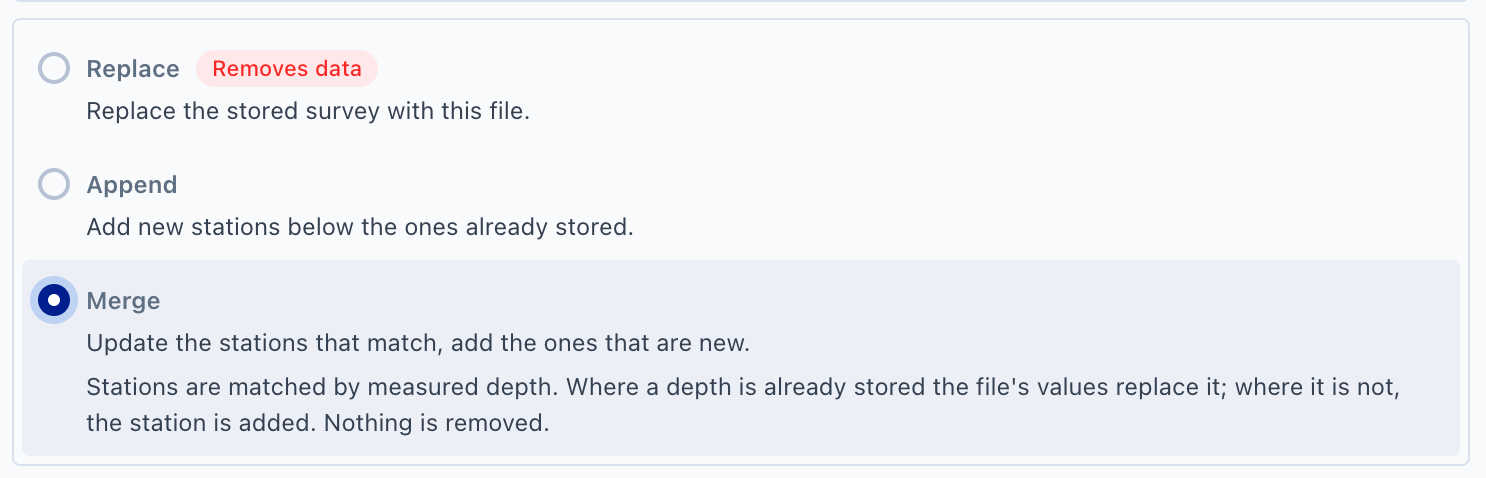
- Import Mode — a set of radio options (fetched per well, so the exact list can vary) describing how the new data combines with anything already there. Each option shows a label, a one-line summary, and — once selected — more detail. Any mode that overwrites existing data is flagged with a red Removes data badge.
Click Continue to run a dry-run and move to the final confirmation. If validation fails, the specific fields with problems are highlighted and you can't continue until they're fixed.

Step 3 — Confirm Import
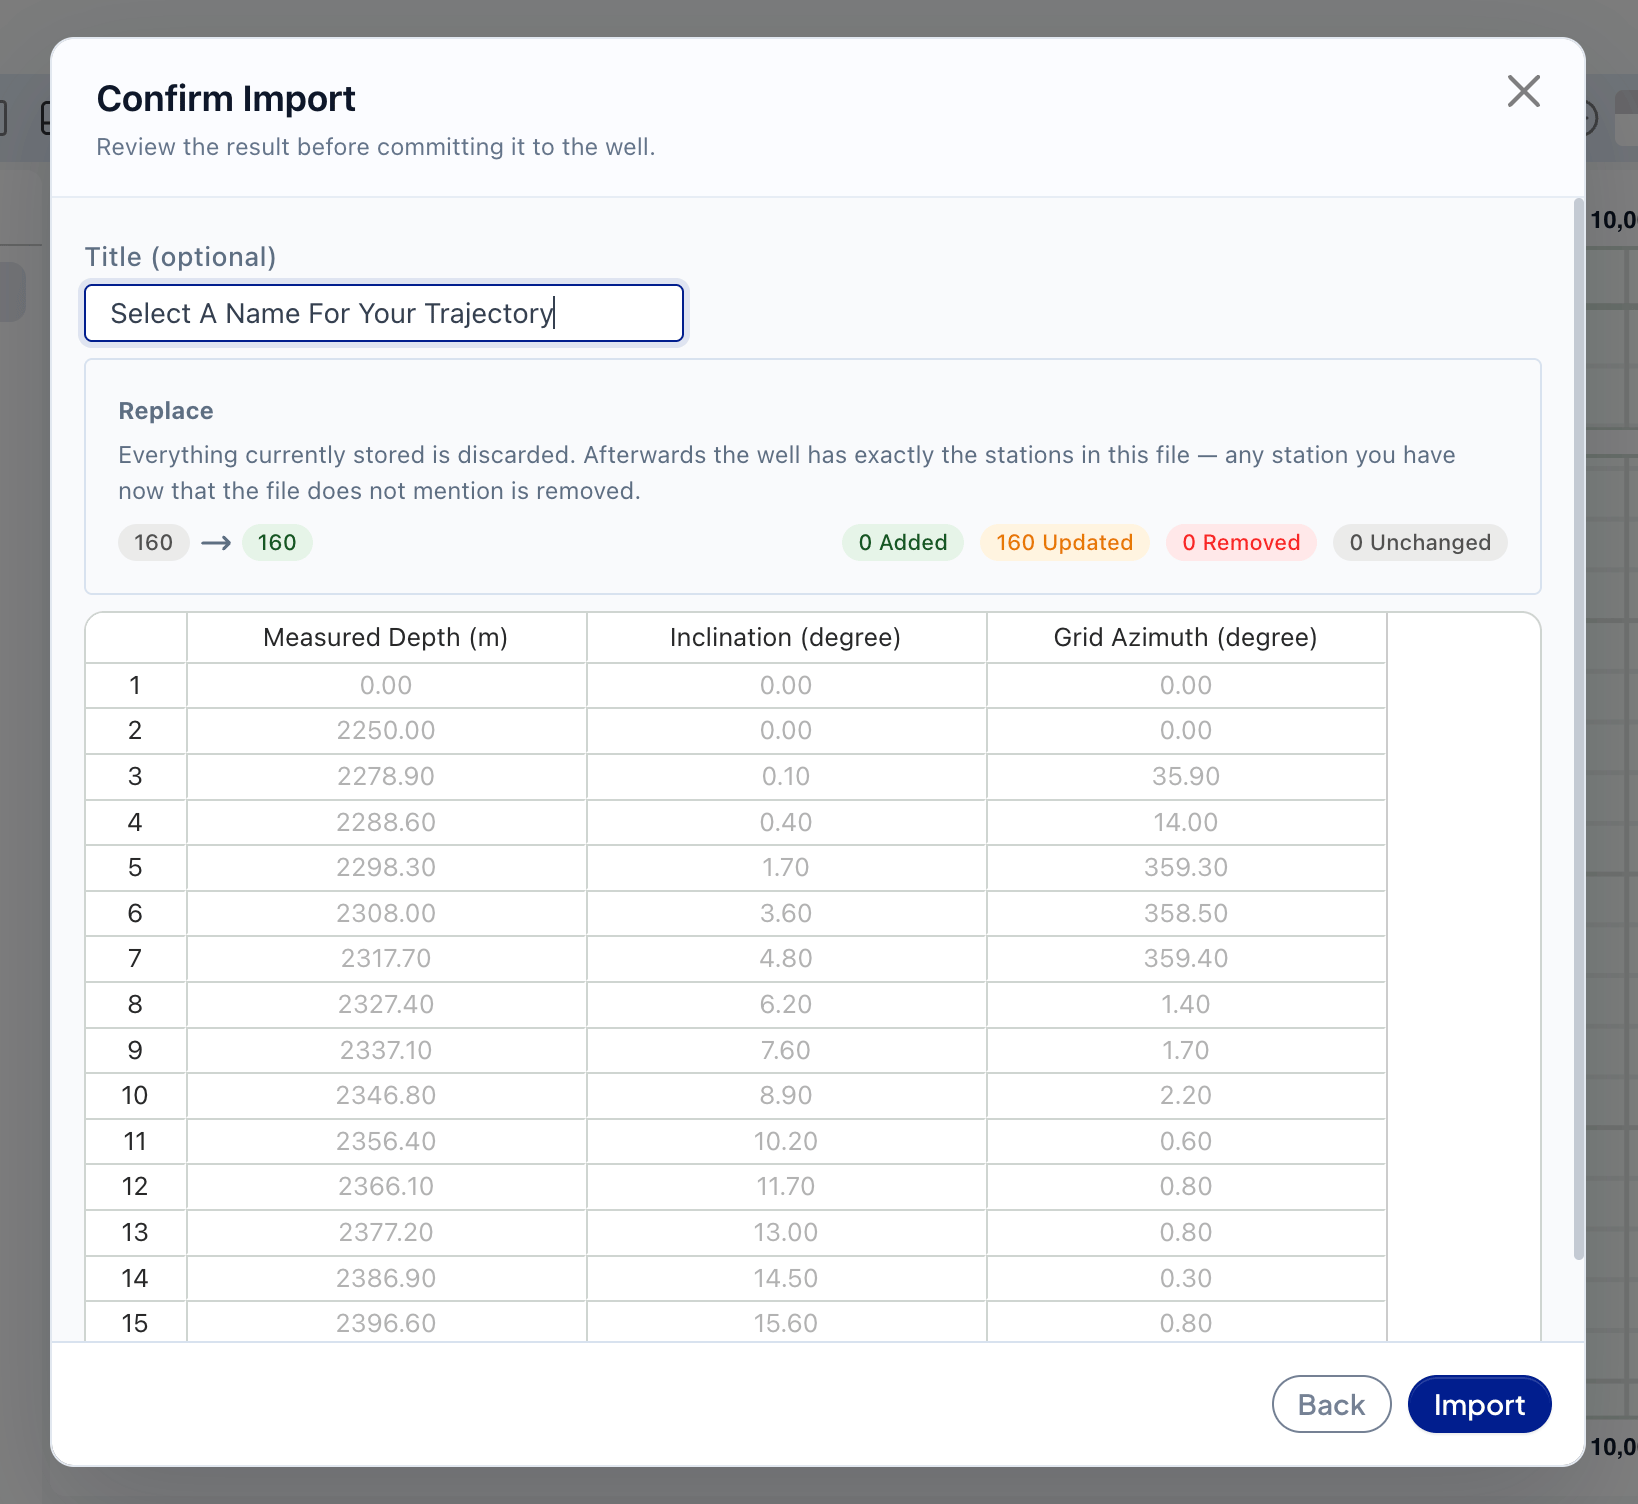
Before anything is written, you get a dry-run summary:
-
Title (optional) — name this trajectory; if left blank, GeoMaster assigns a default.
-
Errors / warnings recap — anything still worth checking before committing.
-
Mode recap — the mode you picked, its detail text, and (for merge-type modes) a before → after row-count comparison with Added, Updated, Removed, and Unchanged counts.
-
Data preview table — a read-only grid of the rows that will actually be imported, in their final units.
Click Import to commit. On success, a confirmation toast ("Import completed.") appears and the dialog closes — your trajectory now shows in the GeoSteering, Map View, and 3D View tabs.
Notes
-
The same three-step wizard (with a different registry configuration) is used for importing Logs and Well Plans — the source-picker and mapping-table mechanics are identical; only the type-specific fields (like Tie-In for survey) differ. Formation Tops import is different — it's a separate, simpler 2-step flow with a directly editable table instead of column mapping (see the Import Formation Tops doc).
-
Re-importing over an existing trajectory uses this same wizard via Edit — the Import Mode step is where you control whether it merges, appends, or replaces the existing data.