

Import Logs
"Logs" are depth-indexed curve data (gamma ray, resistivity, and similar LWD/MWD curves) plotted alongside the trajectory in the GeoSteering cross-section.
"Logs" are depth-indexed curve data (gamma ray, resistivity, and similar LWD/MWD curves) plotted alongside the trajectory in the GeoSteering cross-section. A log file can contain multiple curves at once, imported together.
Prerequisite: a well needs a trajectory already imported before you can import logs — logs are indexed against that trajectory. If you haven't imported survey data yet, do that first.
Where to Import Logs
-
Open a project and go to the GeoSteering tab.
-
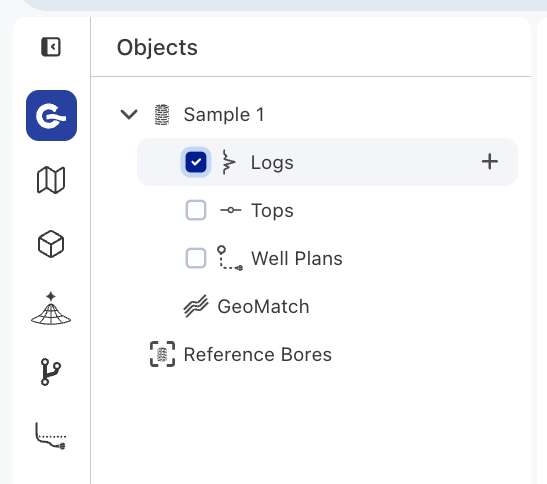
In the left data/objects panel, expand your well's node, then its Logs node.
-
Add a new log: click the + (create) button on the Logs node.
-
Update or replace an existing log: click the ⋯ menu on that log and choose Edit to re-import it.
-
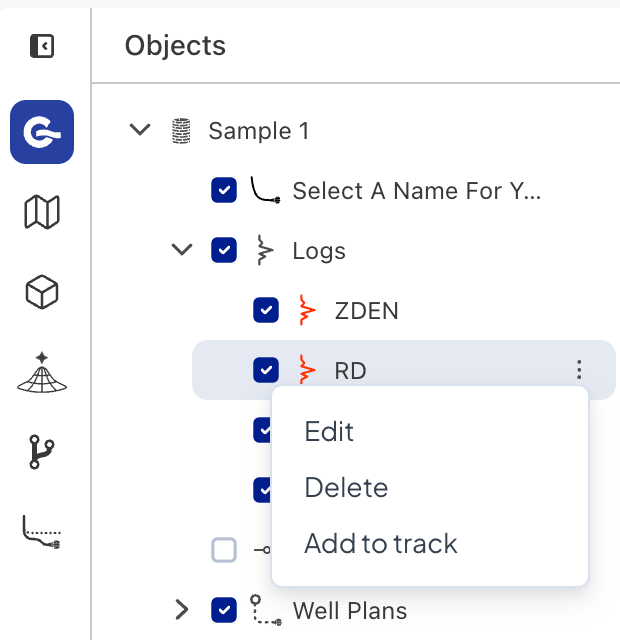
Other actions on an existing log's ⋯ menu: Delete, and Add to track (adds that curve to a display track in the GeoSteering plot — a separate step from importing).
The import wizard has three steps: Import Log → Review Mapping → Confirm Import.
Step 1 — Import Log (choose your source)
| Tab | What it does |
|---|---|
| Drive | Pick a file already stored in GeoMaster Drive (searchable list) |
| Upload | Upload a new file from your computer — click to browse or drag-and-drop |
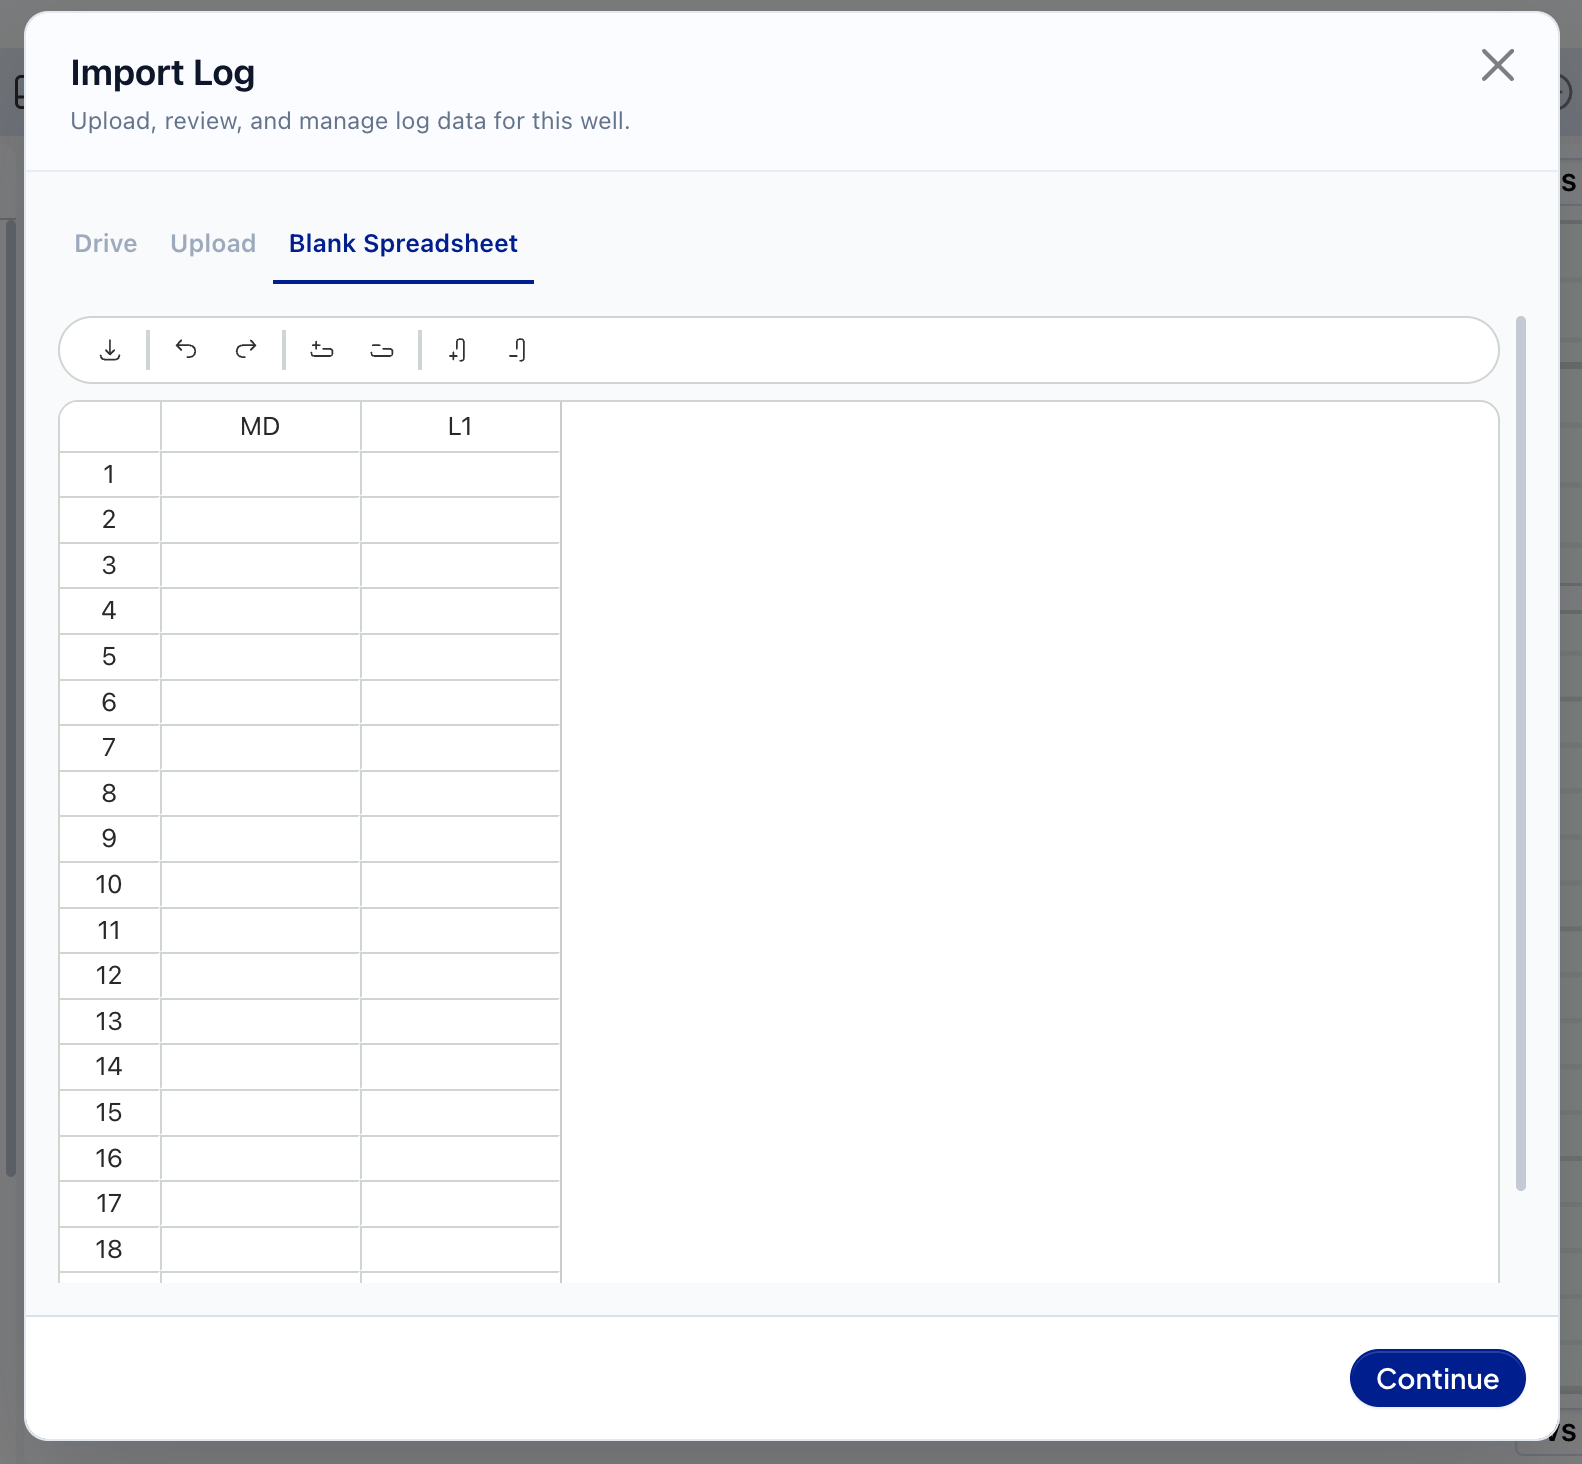
| Blank Spreadsheet | A grid pre-set with MD and one curve column. Unlike the survey spreadsheet, you can rename column headers directly (type your own curve name) and use the toolbar to add more curve columns — useful for pasting in several curves at once |
Accepted uploaded formats include LAS and spreadsheet files (CSV/XLSX); multi-sheet Excel files get a sheet picker in the next step.
Click Continue to move to mapping.
Step 2 — Review Mapping
Same mechanics as any import in GeoMaster, but note what's not here for logs — there's no Grid Convergence, Magnetic Declination, or Tie-In section; those are survey-only.
-
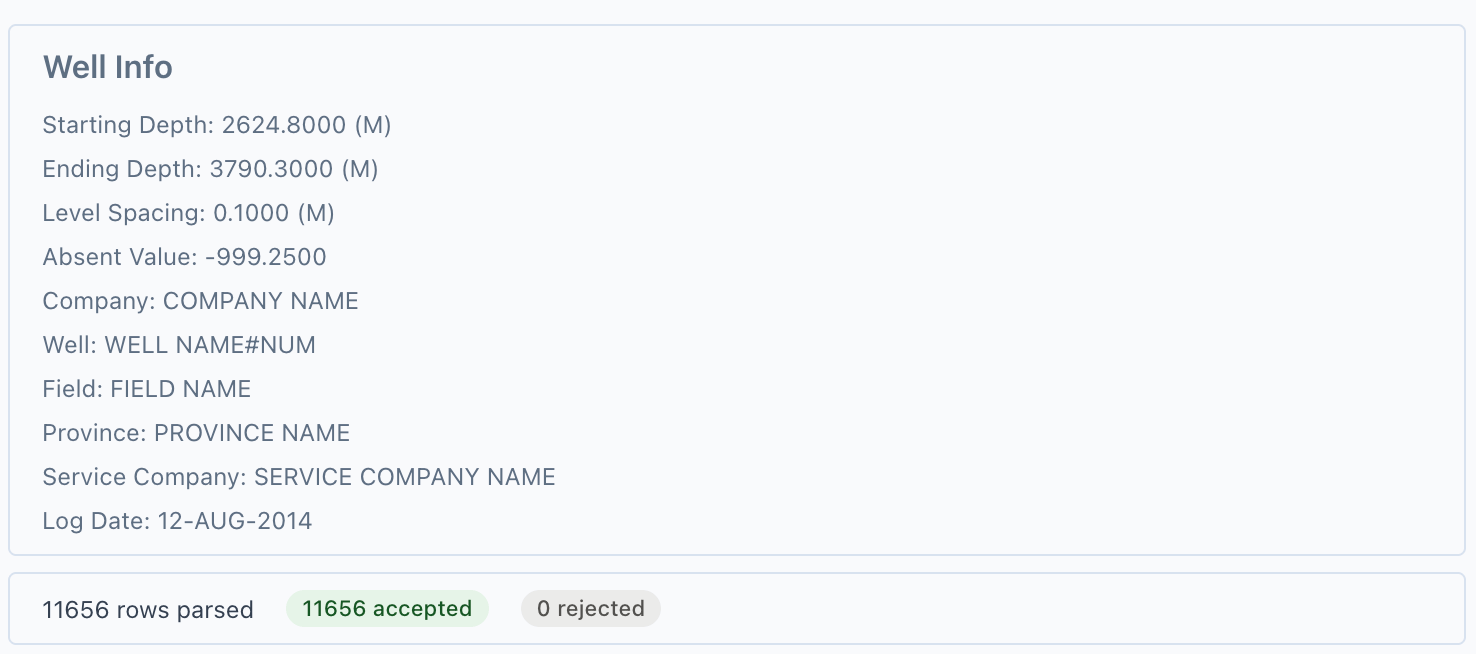
File info — LAS "Well Info" box, or an Excel Sheet dropdown.
-
Row summary — total rows parsed, accepted vs. rejected.
-
Warnings (if any), colour-coded by severity.
-
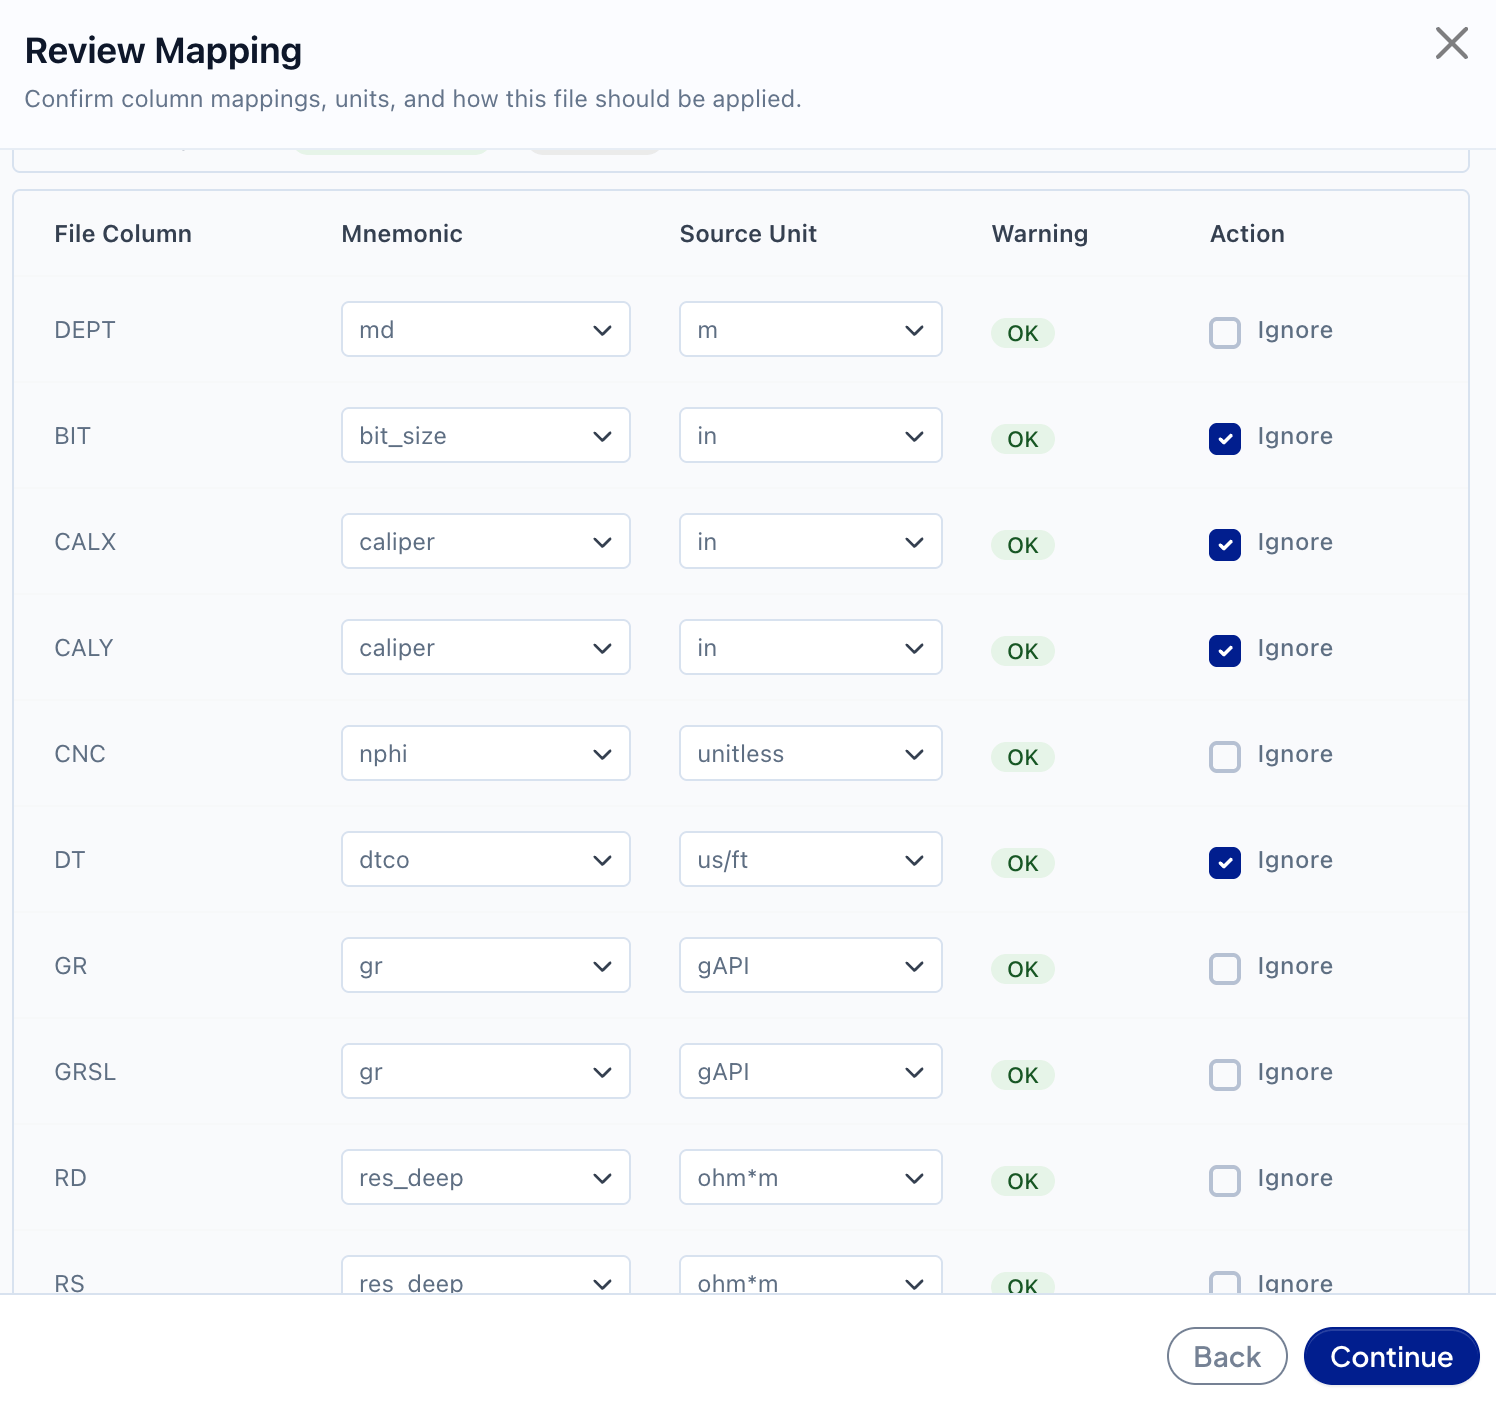
Column mapping table — one row per curve/column in your file:
| Column | What you set |
|---|---|
| File Column | Read-only — the raw header from your file |
| Mnemonic | Searchable dropdown — map this column to a known curve type (e.g. GR, RHOB, RES) |
| Source Unit | Searchable dropdown — the unit the column is actually in |
| Warning | Status badge; hover for detail |
| Action | Ignore checkbox to exclude that column/curve entirely |
Since a single file can carry several curves, you'll typically map multiple rows here — one per curve — and can ignore any you don't want imported.
- Import Mode — radio options describing how the new curve data combines with anything already stored for this log. Options and detail text are fetched per well; any option that overwrites existing data carries a red Removes data badge.
Click Continue to run a dry-run and move to confirmation.

Step 3 — Confirm Import
-
No Title field — logs don't get a name here (unlike survey imports); each curve keeps its mapped mnemonic/name.
-
Errors / warnings recap.
-
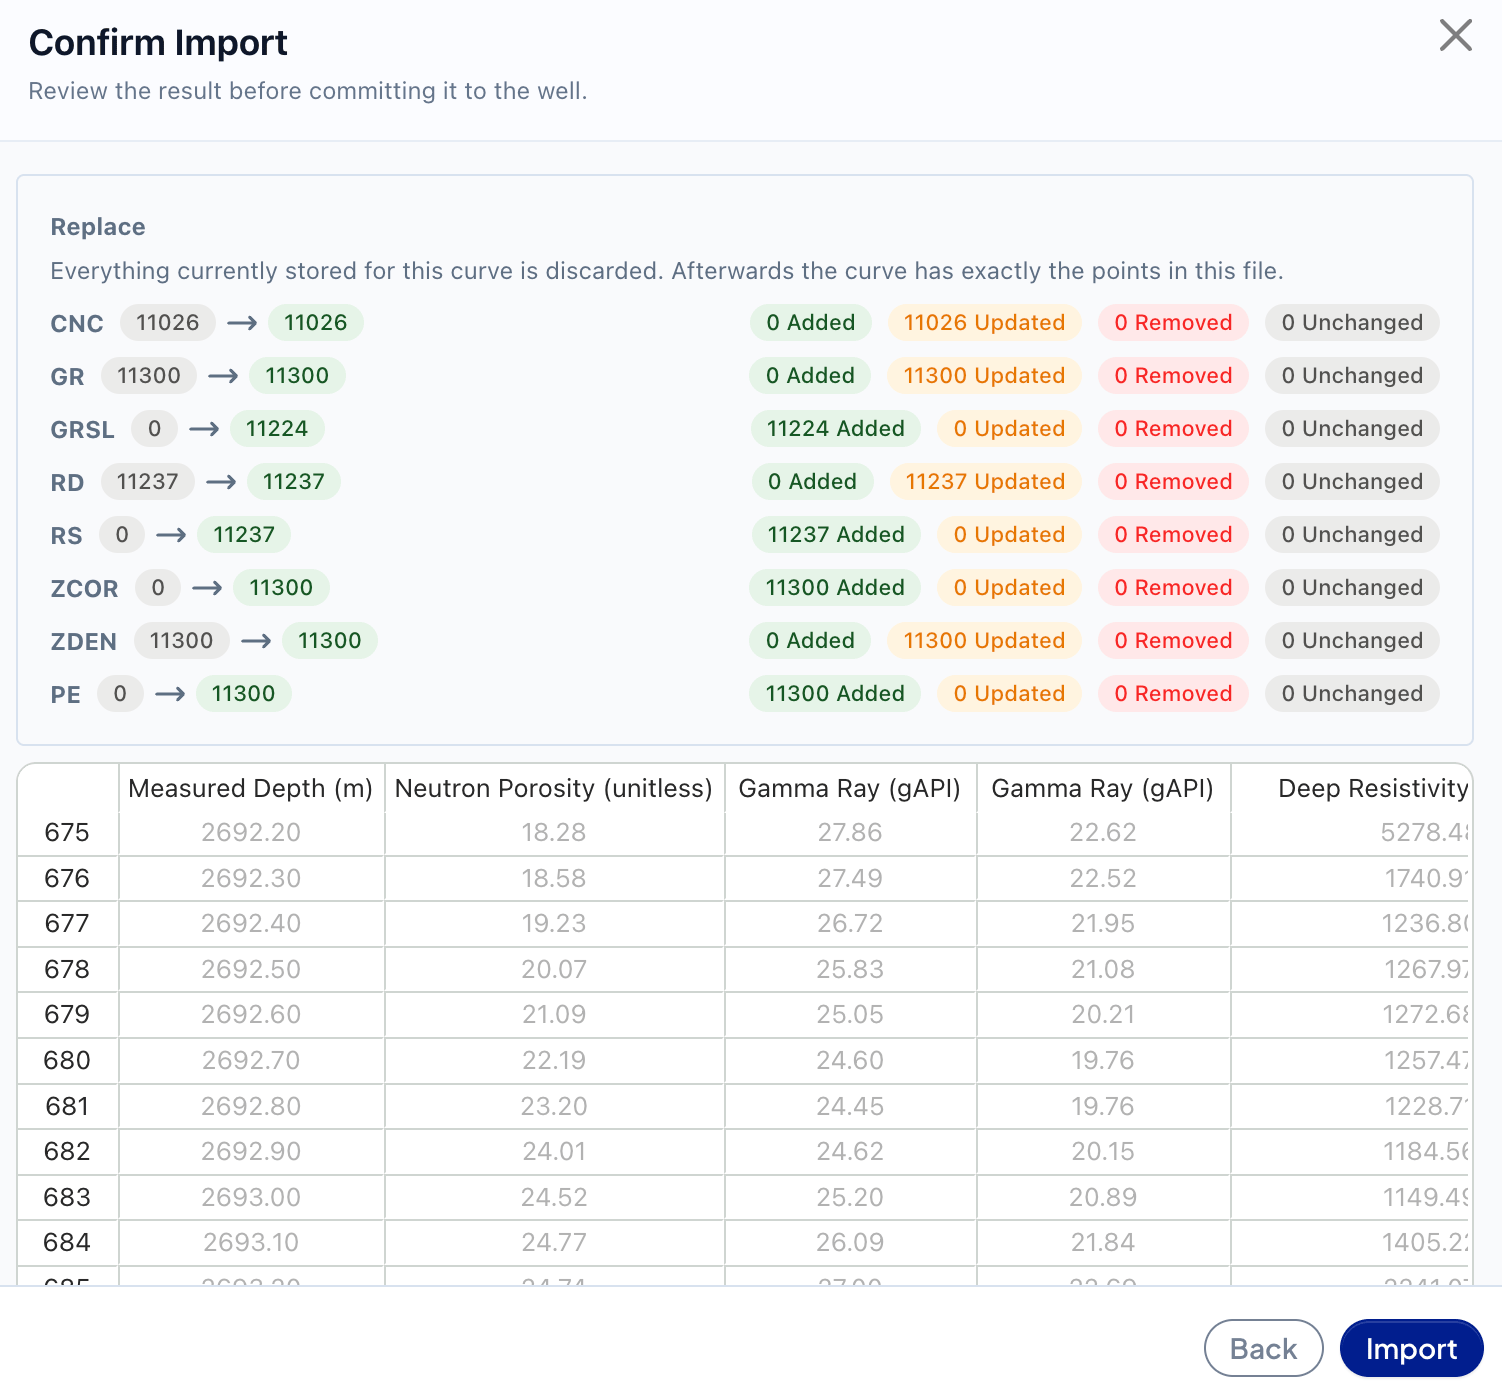
Mode recap, per curve — for every curve in the file, a before → after row-count comparison with Added, Updated, Removed, and Unchanged counts, so you can see exactly what each individual curve will change before committing.
-
Data preview table — read-only grid of the rows that will be imported, in their final units.
Click Import to commit. A "Import completed." toast confirms success, and the new/updated curves appear under the well's Logs node — and in the GeoSteering plot once added to a track.
After Importing — Adding a Log to the Plot
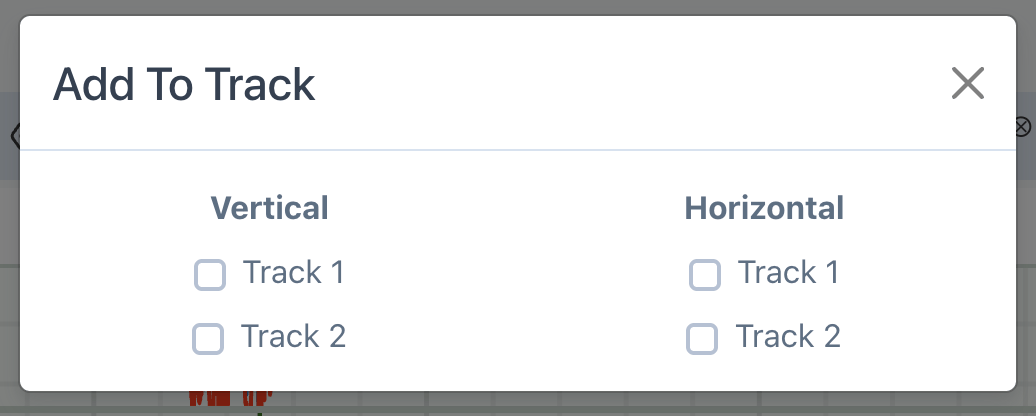
Importing a log makes its data available, but it won't appear in the GeoSteering cross-section until you add it to a display track:
-
Click the ⋯ menu on the log (under the well's Logs node).
-
Click Add to track.
- Now choose in where to display the log on.
Import Survey (Trajectory) Data
"Survey" data is the well trajectory, the MD/INC/AZI stations that define the wellbore path.
Import Formation Tops
"Tops" are named depth markers, formation boundaries, plotted on the GeoSteering cross-section. One top can be flagged as the Sweet Spot (your target zone).