

Create a Project
A Project in GeoMaster is built on top of a single wellbore. Creating a project is really "pick (or create) a well and wellbore, then GeoMaster spins up the…
A Project in GeoMaster is built on top of a single wellbore. Creating a project is really "pick (or create) a well and wellbore, then GeoMaster spins up the workspace for it" — there's no separate project-details form to fill in.
Where to Create a Project
Two entry points, both opening the same Create Project dialog:
-
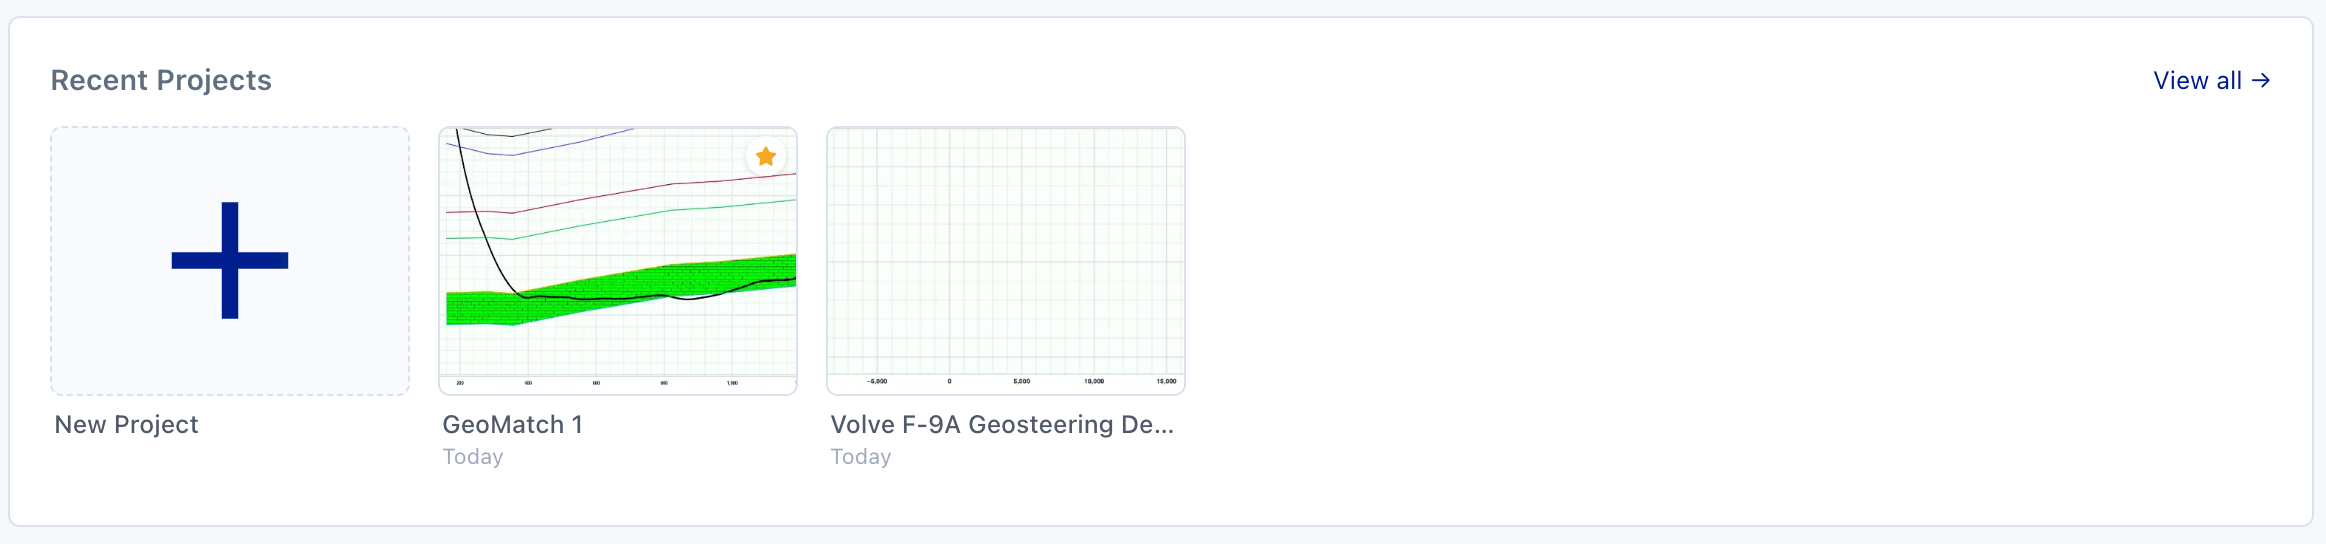
Dashboard — click the New Project tile at the front of the Recent Projects strip.
-
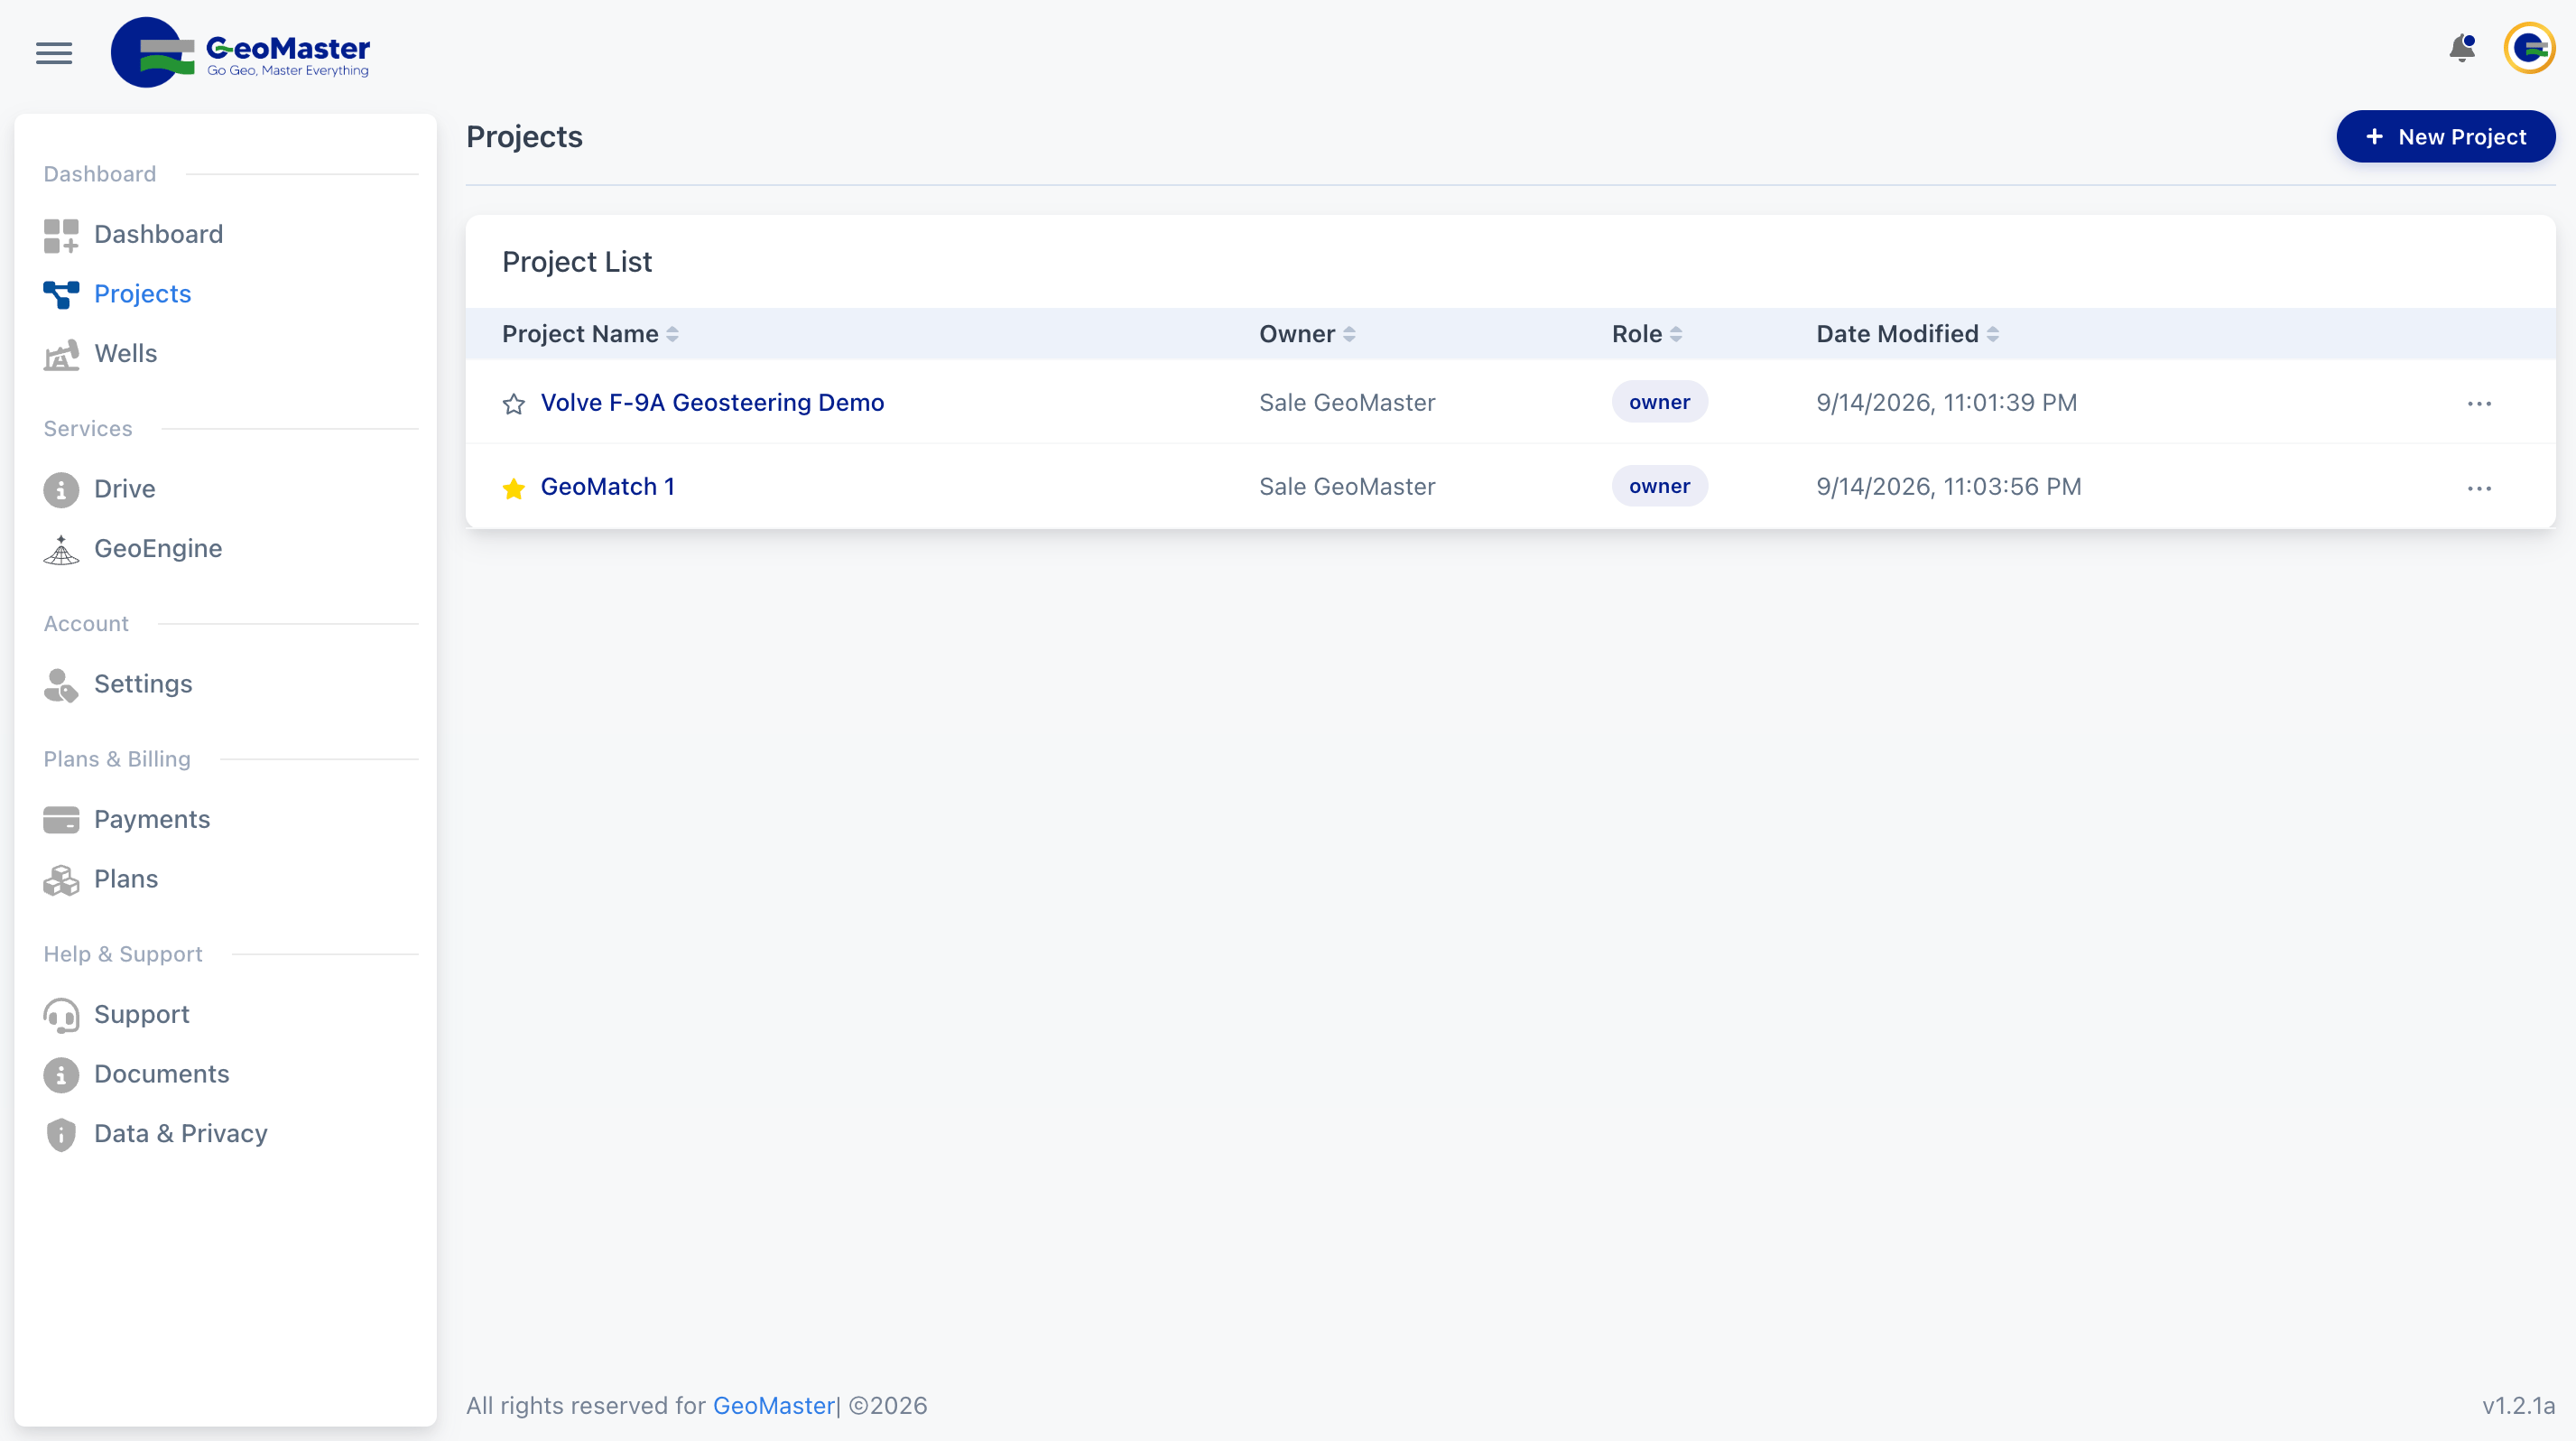
Projects page (
/projects) — click New Project in the top-right of the page header.
Step 1 — Select or Create a Well
The dialog opens with the instruction "Select a well to associate with your new project."
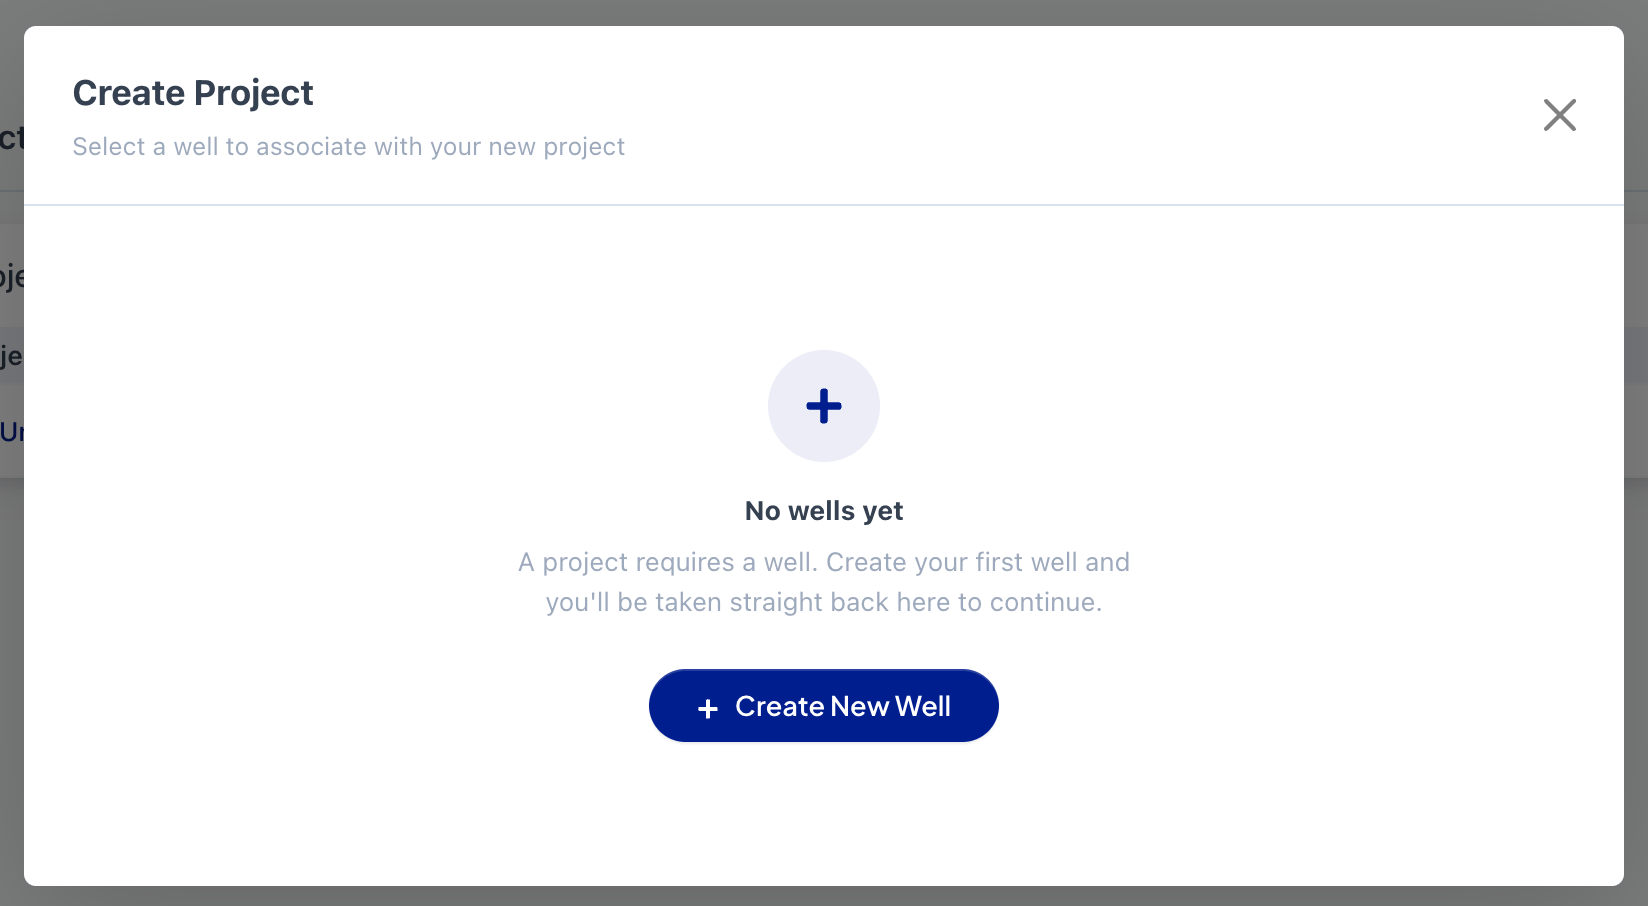
If you have no wells yet: you'll see an empty state — "No wells yet. A project requires a well. Create your first well and you'll be taken straight back here to continue." — with a Create New Well button. Clicking it opens the same Create Well form covered in the "Create a Well" doc; once saved, you're dropped right back into this dialog with your new well ready to select.
📸 Screenshot 3: The empty state — "No wells yet" with the "Create New Well" button.
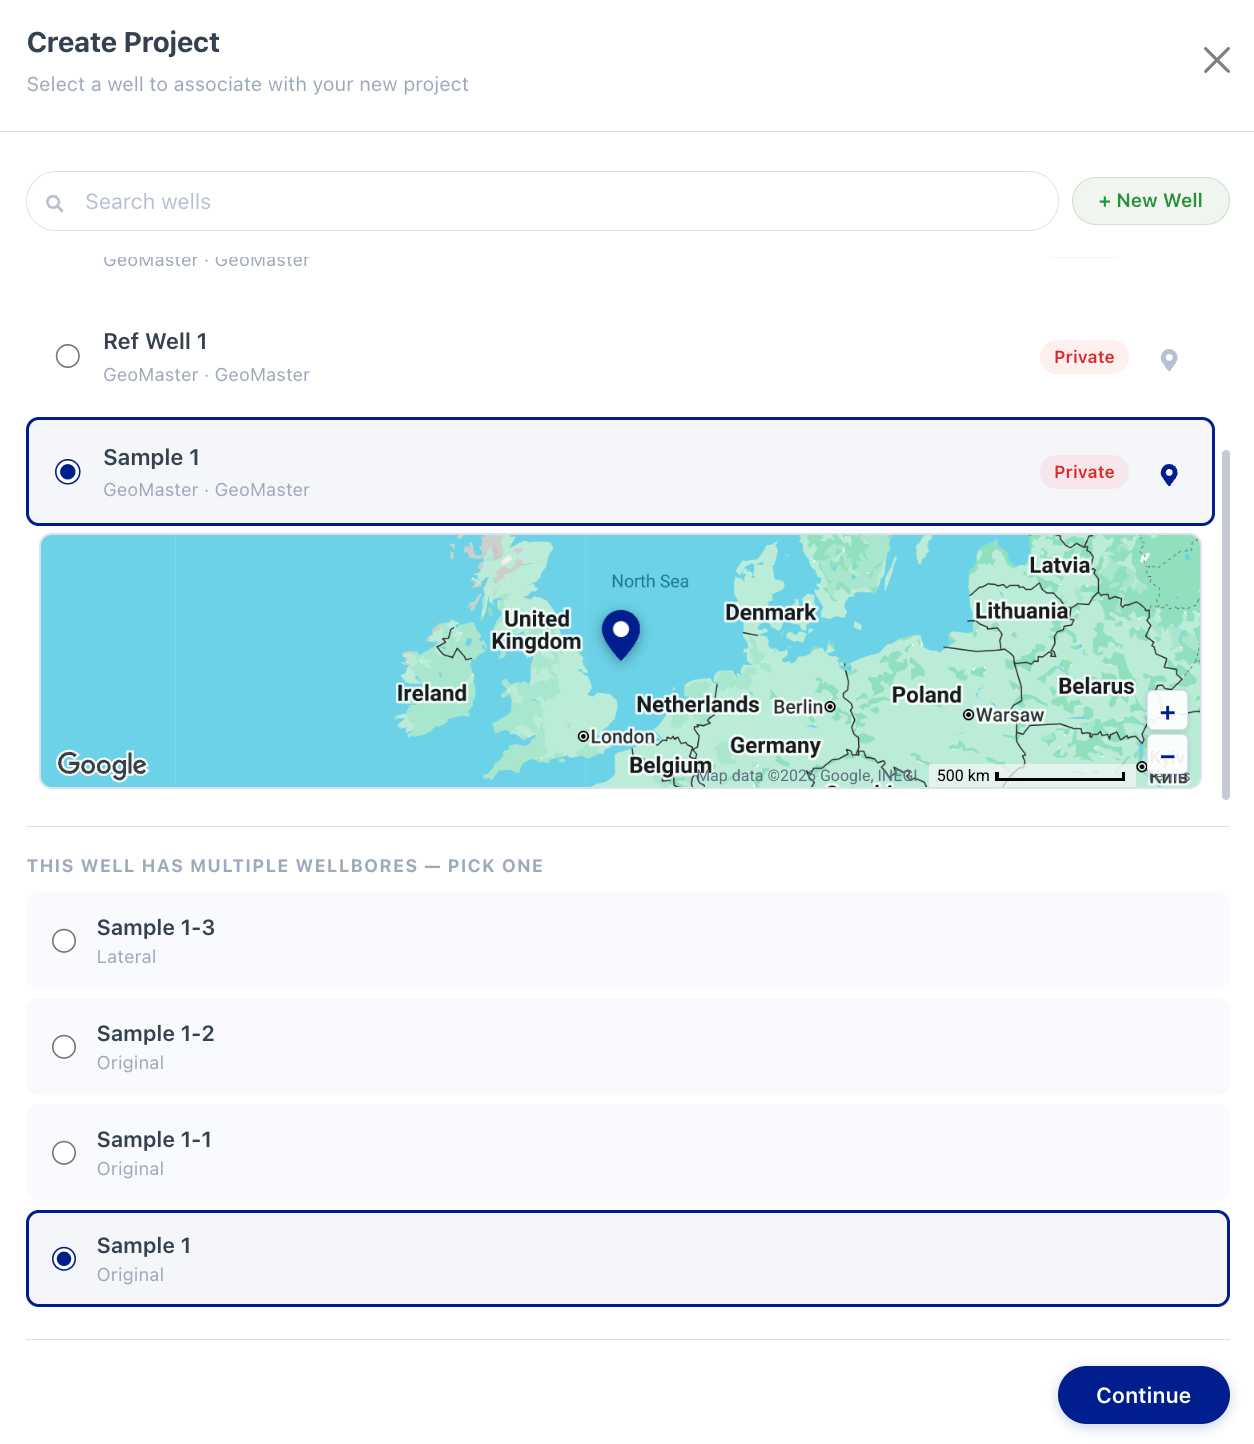
If you already have wells: you'll see a searchable well picker instead:
-
A Search wells box at the top filters the list as you type.
-
A + New Well button next to the search box lets you add another well without leaving the dialog.
-
Each well in the list shows its name, owner/operator company, and a Private/Public badge.
-
Click the small map-pin icon on a row to expand an inline mini-map showing that well's location.
-
Click a well (or its radio button) to select it.
Step 2 — Select a Wellbore
Once a well is selected, GeoMaster looks at its wellbores:
-
Exactly one wellbore — it's selected automatically, and a note confirms: "This well has one wellbore — '<name>' wellbore was selected automatically." No extra action needed.
-
Multiple wellbores — a list appears: "This well has multiple wellbores — pick one." Click the wellbore you want to build the project on.
Step 3 — Continue
Click Continue at the bottom of the dialog (it stays disabled until a wellbore is selected, one way or another).
-
GeoMaster creates the project against that wellbore and shows a success toast: "Project has been created successfully."
-
You're taken directly into the new project's workspace at its URL (
/projects/<id>) — no intermediate confirmation screen.
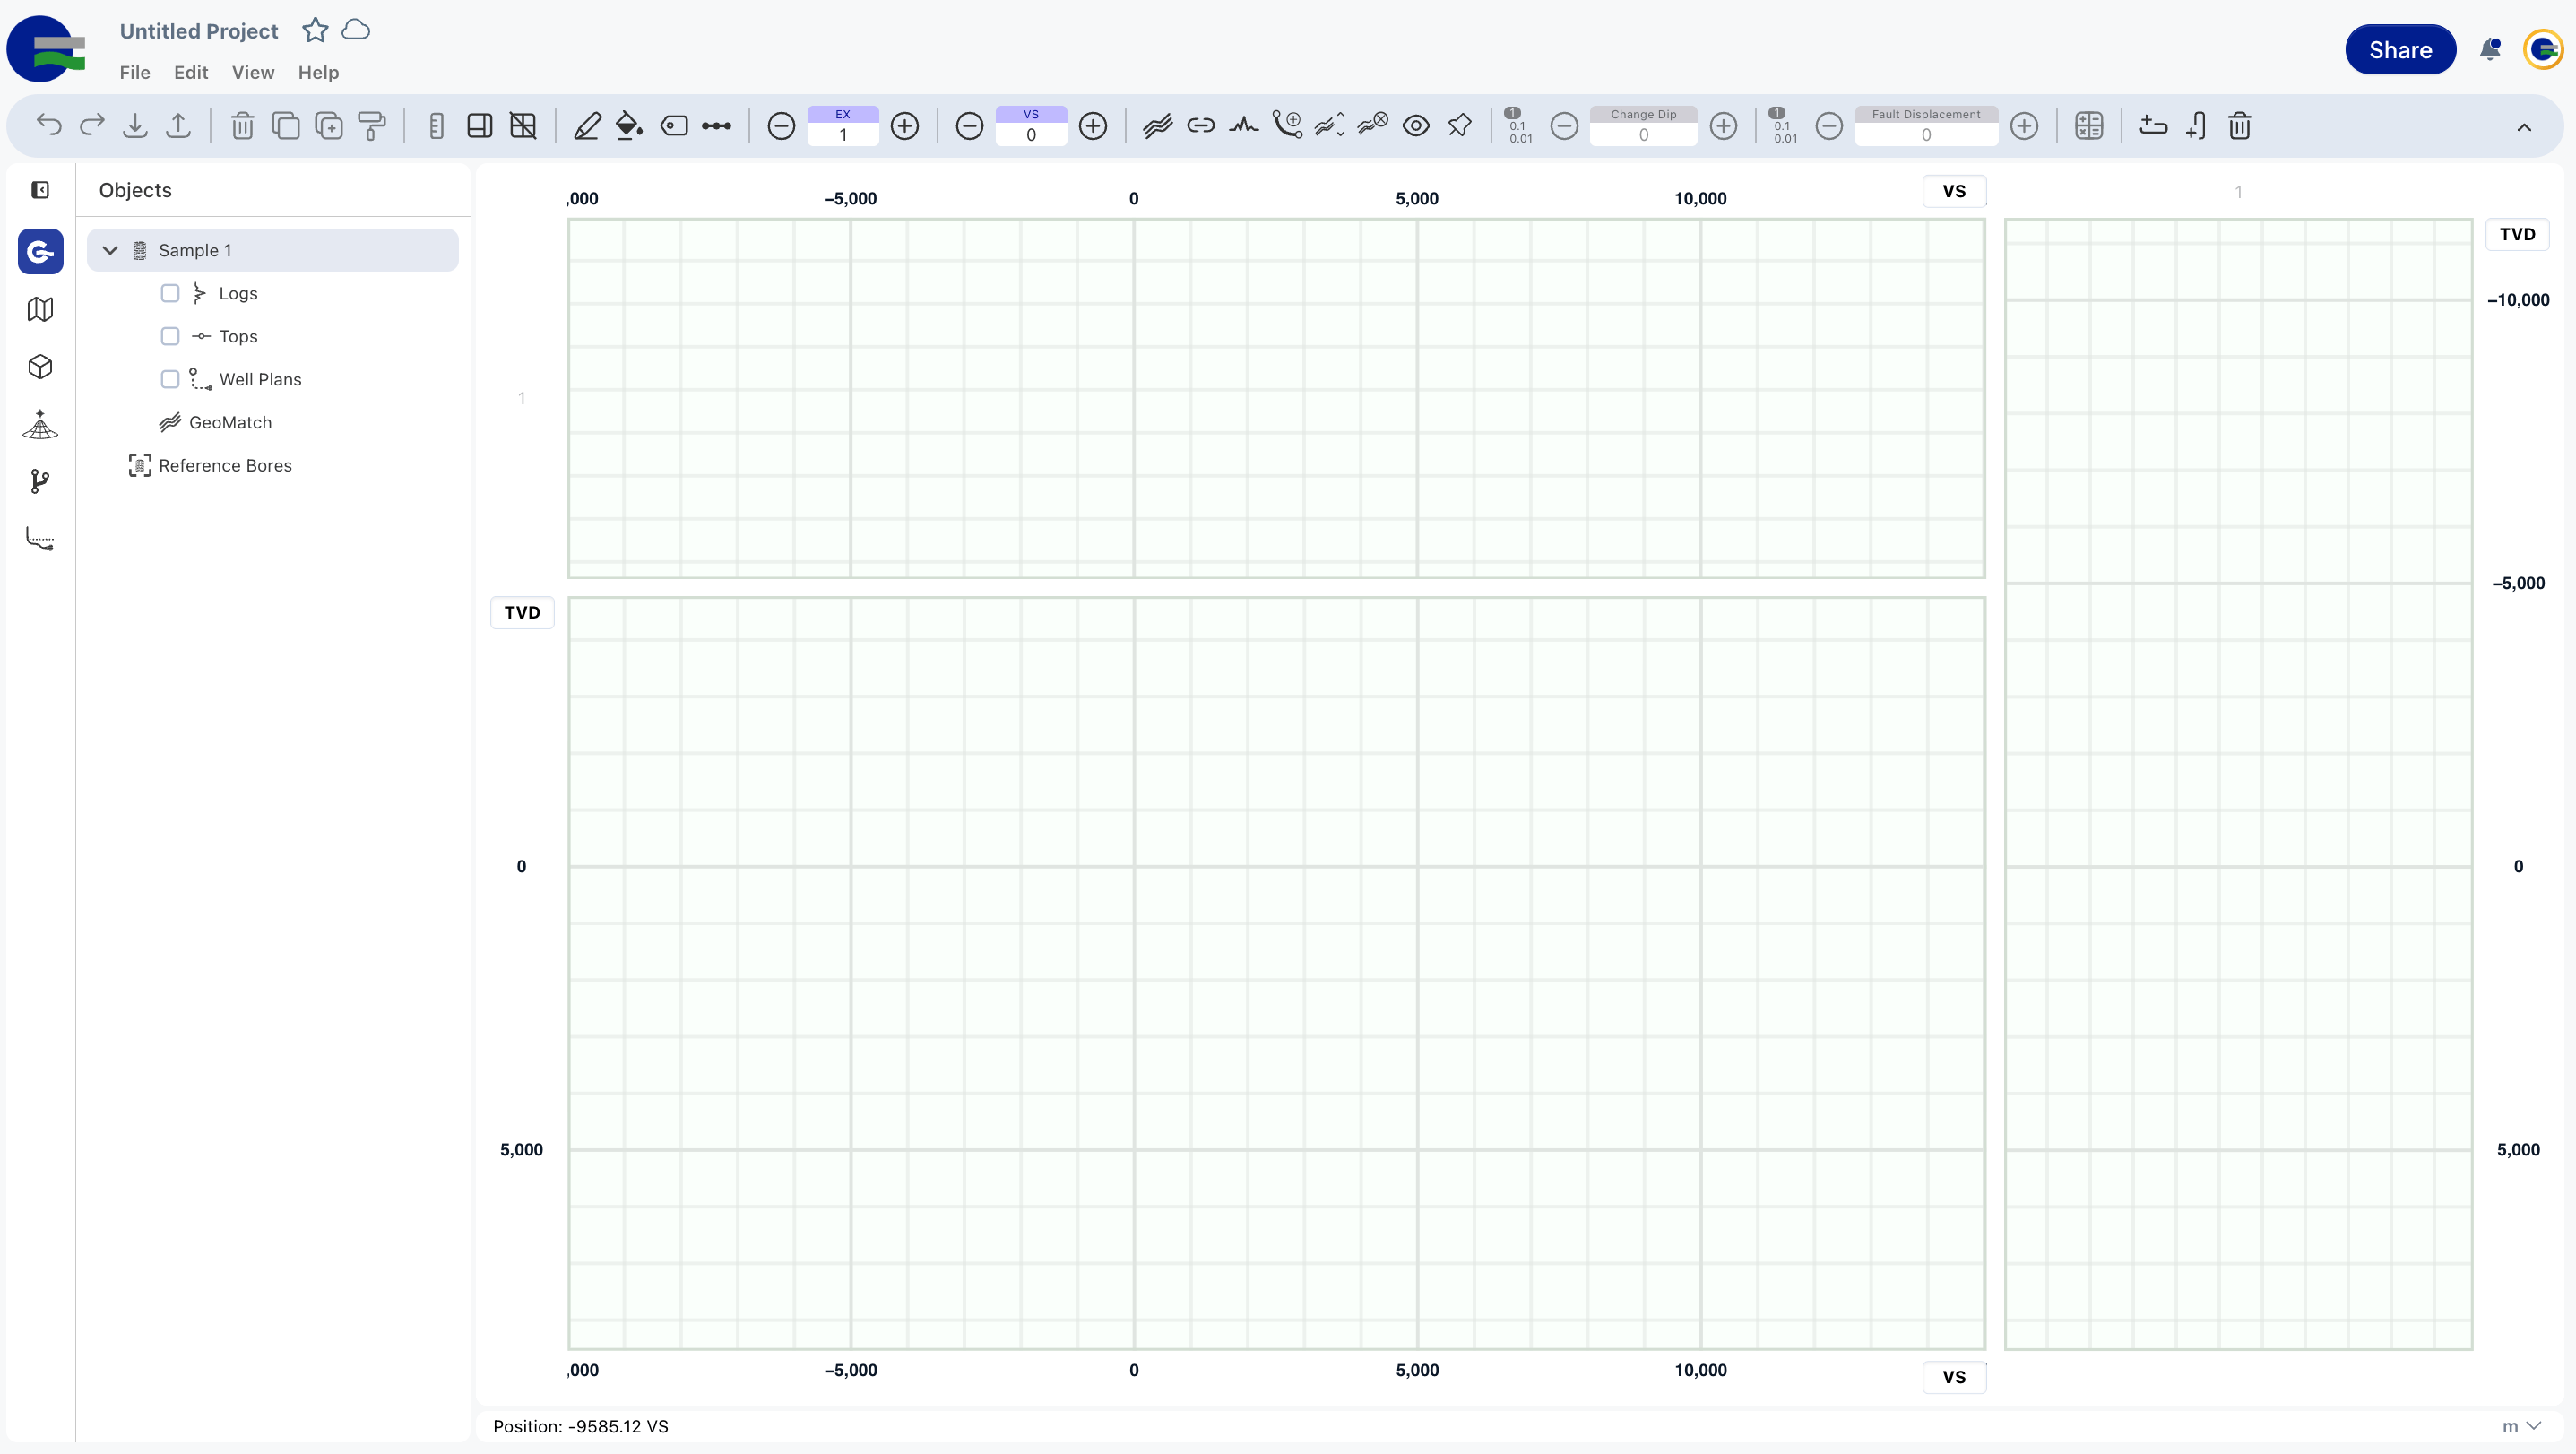
Landing in the Workspace
The new project opens straight into its workspace, with a collapsible icon sidebar on the left:
| Tab | What it opens |
|---|---|
| GeoSteering | The real-time cross-section — trajectory, logs, formation tops |
| Map View | Plan-view map of the well/field |
| 3D View | 3D visualisation of the trajectory and model |
| GeoEngine | The AI assistant scoped to this project |
| Version History | Saved versions of the project's geosteering interpretation |
| DrillTracker | Live drilling parameter charts |
Since the project was just created, most of these will be empty until you import trajectory/log data — that's a separate step, not part of project creation itself.
Quick Reference
| Situation | What happens |
|---|---|
| No wells at all | "Create New Well" → returns to well picker automatically |
| Wells exist, none selected | Well picker shown, "Continue" disabled |
| Well selected, 1 wellbore | Wellbore auto-selected, "Continue" enabled |
| Well selected, 2+ wellbores | Must pick a wellbore manually before "Continue" enables |
| Continue clicked | Project created → redirected straight into its workspace |